
How I Added a User-Friendly GUI and File Browser to My DeepSpeech Speech-to-Text Tool
Introduction:
When I first built my speech-to-text tool using DeepSpeech, it worked like a charm. But there was one problem: it would work only in the terminal. Anyone who wasn’t comfortable with command-line tools found it very hard to use them. That’s when I thought, why not give it a simple GUI? Something where users can just click a button, pick an audio file, and get the transcription instantly—no coding, no commands. In this post, I’ll walk you through the process of adding a Graphical User Interface (GUI) and a file browsing feature to my existing DeepSpeech script.
Why Add a GUI?
Without a GUI, only programmers can use this script, but normal people cannot use it for their purposes.
By adding a GUI, we can get the following advantages.
- User-Friendly: Anyone can use it without touching the code.
- Interactive: Click, browse, and transcribe in seconds.
- Professional: Feels like a real app instead of a developer tool.
Tools I Used
To add a GUI, I picked Tkinter, the built-in Python library for simple desktop interfaces. It’s easy to learn, works on all platforms, and doesn’t need extra installations.
Here’s the updated plan:
- Original DeepSpeech Code → Handles transcription.
- Tkinter GUI → Allows file browsing and running the transcription with a single click.
- Output Box → Displays the transcribed text right inside the app.
The Updated Code
Here’s the new version with a GUI and file browsing:
import deepspeech
import wave
import numpy as np
import os
import sys
import tkinter as tk
from tkinter import filedialog, messagebox, scrolledtext
# Paths for model and scorer
model_file_path = r”C:\TRANSCRIBE\deepspeech-0.9.3-models.pbmm”
scorer_file_path = r”C:\TRANSCRIBE\deepspeech-0.9.3-models.scorer”
# Load model
if not os.path.exists(model_file_path) or not os.path.exists(scorer_file_path):
sys.exit(“Model or scorer file missing!”)
print(“Loading DeepSpeech model…”)
model = deepspeech.Model(model_file_path)
model.enableExternalScorer(scorer_file_path)
# Transcription function
def transcribe(audio_file):
with wave.open(audio_file, “rb”) as wf:
rate = wf.getframerate()
channels = wf.getnchannels()
width = wf.getsampwidth()
if rate != 16000:
raise ValueError(f”Expected 16kHz audio, got {rate} Hz”)
if channels != 1:
raise ValueError(“Audio must be mono (1 channel)”)
if width != 2:
raise ValueError(“Audio must be 16-bit PCM”)
frames = wf.getnframes()
buffer = wf.readframes(frames)
audio = np.frombuffer(buffer, dtype=np.int16)
return model.stt(audio)
# GUI setup
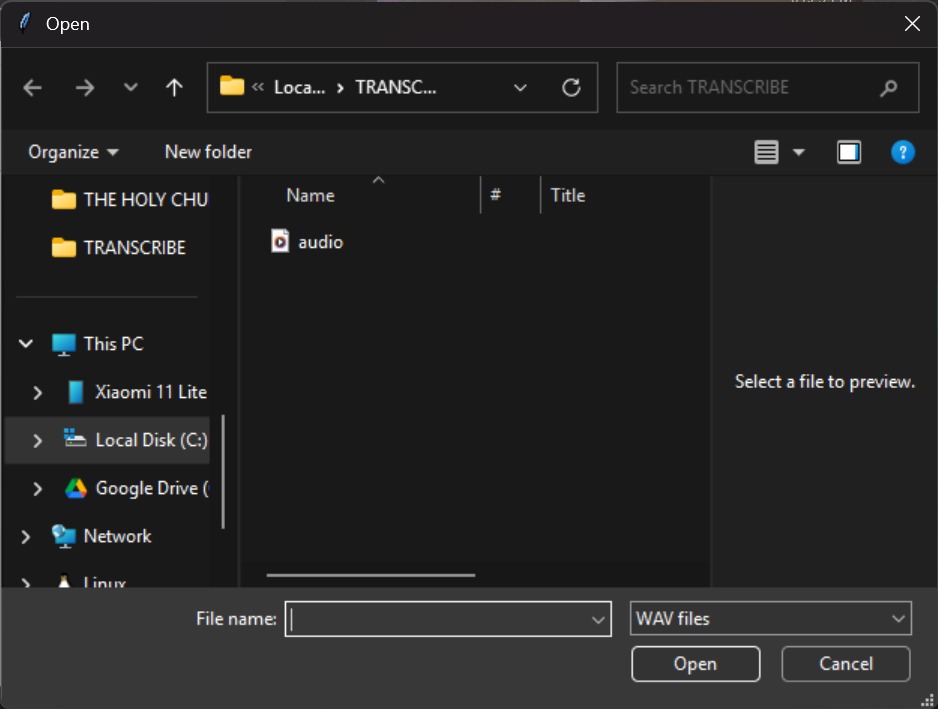
def browse_file():
file_path = filedialog.askopenfilename(filetypes=[(“WAV files”, “*.wav”)])
if file_path:
try:
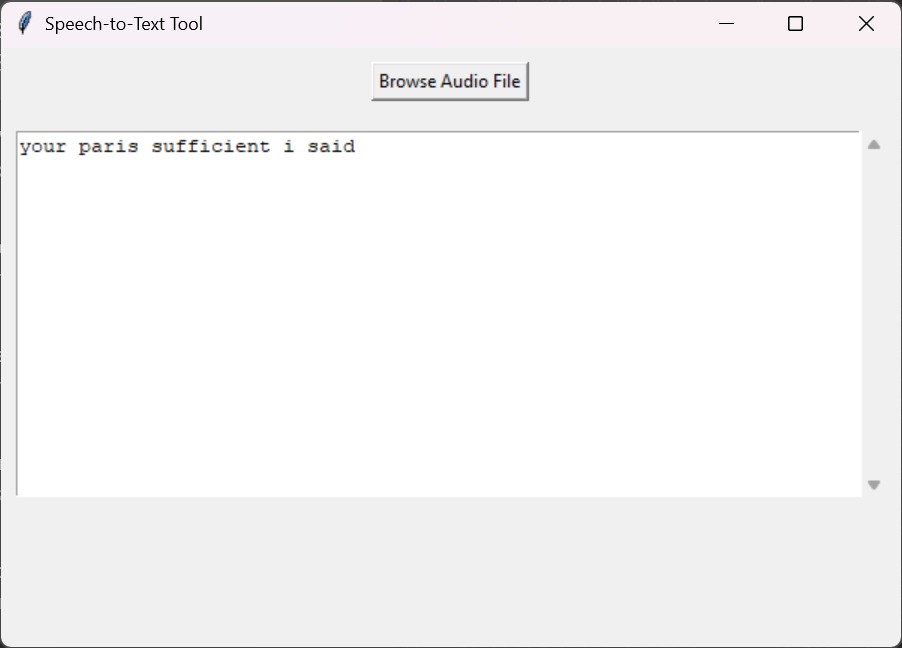
text = transcribe(file_path)
output_box.delete(1.0, tk.END)
output_box.insert(tk.END, text)
except Exception as e:
messagebox.showerror(“Error”, str(e))
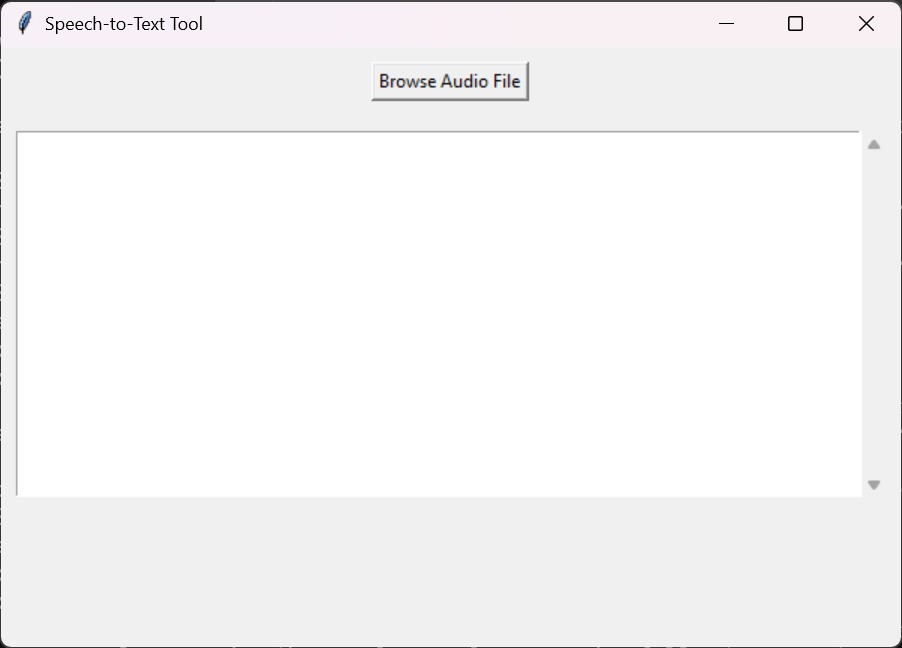
root = tk.Tk()
root.title(“Speech-to-Text Tool”)
root.geometry(“600×400”)
browse_button = tk.Button(root, text=”Browse Audio File”, command=browse_file)
browse_button.pack(pady=10)
output_box = scrolledtext.ScrolledText(root, wrap=tk.WORD, width=70, height=15)
output_box.pack(padx=10, pady=10)
root.mainloop()
How It Works
- Browse Button → Lets you select any .wav file from your computer.
- Transcription Runs → Uses your original DeepSpeech model in the background.
- Text Appears in the Box → No need to touch the command line anymore!
Future Improvements
This is just the beginning. Some ideas I have for the next version:
- Adding real-time microphone recording support.
- Exporting transcribed text as a .txt or .docx file.
- Making a standalone Windows app with PyInstaller.
Conclusion
By adding a GUI with Tkinter, I turned my DeepSpeech script into a simple desktop tool anyone can use. It’s a big step towards making speech-to-text technology more accessible and fun to use.
User-Friendly GUI and File Browser to My DeepSpeech Speech-to-Text Tool
FAQs
Q1. Do I need to install Tkinter separately?
No, Tkinter comes pre-installed with Python.
Q2. Can this work with MP3 files?
DeepSpeech requires WAV files, but you can convert MP3 to WAV using libraries like pydub.
Q3. Is this app cross-platform?
Yes, it works on Windows, macOS, and Linux as long as you have Python installed.
Q4. How do I make it into a standalone app?
You can use pyinstaller to create a .exe file for Windows users.

I like the efforts you have put in this, regards for all the great content.