
[ad_1]
In a earlier article, we briefly defined the upcoming adjustments within the Blazor .NET8 Render Modes, which let you specify per Razor web page or particular person element if that web page or element could be rendered on the server (WebSocket), on the consumer (WebAssembly), or in auto mode (interactive server facet rendering on first vist, and subsequently on the consumer).
With the Render Modes having been launched with the discharge model of Blazor in meantime, let’s have a extra detailed look into the completely different Render Mode choices, and tips on how to use them in your utility.
Blazor Recap
Blazor is a free and open-source internet framework that permits builders to create internet apps utilizing C# and HTML. It’s being developed by Microsoft and is a part of the .NET ecosystem. Blazor has two internet hosting fashions: Blazor Server and Blazor WebAssembly. Blazor Server presents a option to construct internet UIs utilizing C# as a substitute of JavaScript. Blazor Server apps are hosted on the server and use real-time communication by way of SignalR to deal with UI updates. Blazor WebAssembly, then again, takes benefit of WebAssembly to do every part within the browser.
Blazor Render Modes
In .NET 8, Blazor has launched a number of enhancements, together with the flexibility to decide on the element render mode at runtime. Which means builders can now add consumer interactivity per element or web page, and generate static HTML content material with parts. Moreover, Blazor in .NET 8 has improved authentication, the flexibility to path to a named factor, and the flexibility to observe circuit exercise.
The render-mode attribute is used to outline the place a root-level element ought to be rendered. The RenderMode choice signifies the way by which the element ought to be rendered. There are a number of supported RenderMode choices, together with Server, ServerPrerendered, and Static. Server mode is rendered interactively as soon as a reference to the browser is established. ServerPrerendered mode is first prerendered after which rendered interactively. Static mode is rendered as static content material.
Each element in a Blazor internet app depends on a selected render mode to find out the internet hosting mannequin that it makes use of, the place it’s rendered, and whether or not or not it’s interactive. To use a render mode to a element use the @rendermode directive on the element occasion or on the element definition.
Static Server and Interactive Server are often known as Server Render Mode. Interactive WebAssembly is named Consumer Render Mode. The Auto choice begins from the server, is cached, after which on subsequent visits is redered on the consumer. This saved bandwidth and means quicker load instances.
Allow Assist for Interactive Render Modes (Server and Consumer)
When you’re creating a .Blazor internet app, you as a developer must arrange the interactive render modes. Whenever you begin from the supplied challenge template (with pattern information or empty, it doesn’t matter), the template robotically has the next extensions obtainable:
Part builder extensions:
AddInteractiveServerComponentsprovides providers to help rendering Interactive Server parts.AddInteractiveWebAssemblyComponents provides providers to help rendering Interactive WebAssembly parts.MapRazorComponentsdiscovers obtainable parts and specifies the basis element for the app (the primary element loaded), which by default is the App element (App.razor).
Endpoint conference builder extensions:
AddInteractiveServerRenderModeconfigures interactive server-side rendering (interactive SSR) for the app.AddInteractiveWebAssemblyRenderModeconfigures the Interactive WebAssembly render mode for the app.
Particular person parts are nonetheless required to declare their render mode after the element providers and endpoints are configured within the app’s Program file. You may say there’s a challenge configuration half (within the Program.cs file) by which you specified the worldwide challenge render mode, after which you must nonetheless specify the person web page or element render mode.
Utilizing Render Mode in a pattern utility
With the theoretical half out of the way in which, let’s information you thru a step-by-step instance on tips on how to experiment with the completely different Render Modes. We’ll begin from the default Blazor Server Internet App template in Visible Studio, after which we add the Blazor WebAssembly challenge, and reveal the Render Mode choices for an interactive button.
- Ensure you have the newest model of Visible Studio 2022 (17.8.x or larger) put in, along with the .NET 8 SDK.
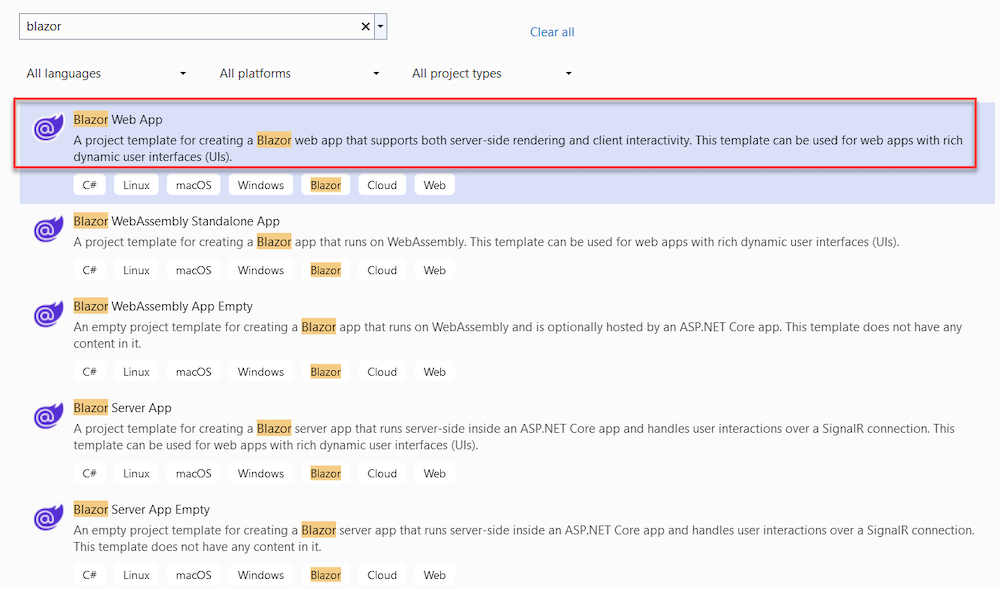
- From Visible Studio, choose Create New Mission and seek for Blazor; it will present a number of completely different choices to select from.
- Choose Blazor Server App as template; click on Subsequent
- Present a reputation on your challenge, for instance BlazorRenderModes
- Within the Extra Data web page, present the next settings:
- Framework: .NET 8.0 (Lengthy Time period Assist)
- Authentication Kind: None
- Configure for HTTPS: chosen
- Interactive Render Mode: Server
- Interactivity Location: Per web page/element
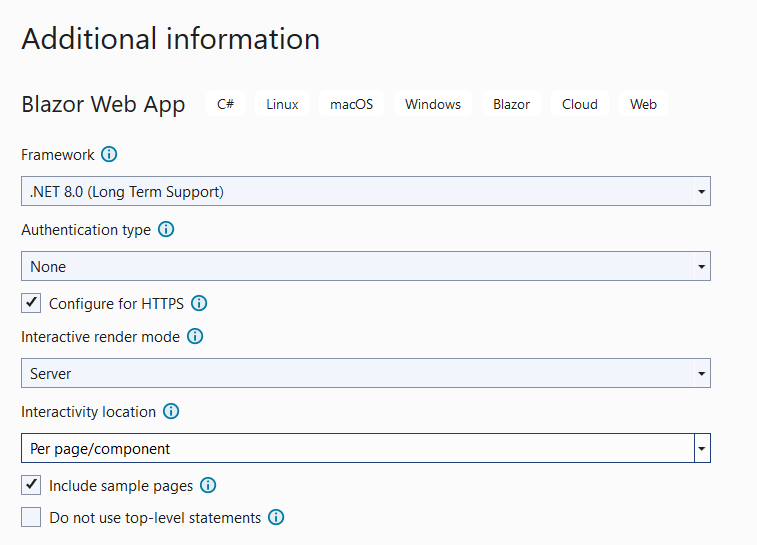
Notice: as you may see, the Mission wizard for Blazor has been up to date with the Render Mode choices already.
- From inside the challenge, open the
Program.csfile, and test the next:builder.Companies.AddRazorComponents() .AddInteractiveServerComponents().
This clarifies what we defined earlier within the Part Builder Extensions, the place our Blazor Server App is now prepared to make use of Interactive Server Render Mode. - A bit additional down in the identical
Program.csfile, you discover the next:app.MapRazorComponents() .AddInteractiveServerRenderMode();
This clarifies what we defined earlier within theMapRazorComponent, the place our Blazor Server App is now prepared to make use of Interactive Server Render Mode. - So as to add an interactive element to our app, let’s add some pattern code to the
Dwelling.razorweb page.@web page "https://www.sitepoint.com/"<PageTitle>Dwelling</PageTitle> This button demonstrates using Blazor Interactive Server Render Mode <button @onclick="Unlocked">Unlock Interactive Render Mode</button> <span>@unlockmessage</span>@code { string unlockmessage = ""; void Unlocked() { unlockmessage = "Interactive Render Mode Unlocked"; } } - The
@web pagesyntax is Blazor’s path to a web page, on this case the Dwelling web page. That is adopted by plain HTML language, exhibiting some textual content, a button, and a textual content factor inside the HTML “<span>” object. - 1The @
codepart accommodates C# language, identical to in a standard ASP.NET internet web page, which reveals a textual content message when the consumer clicks the button. - Save the code and Run the applying.
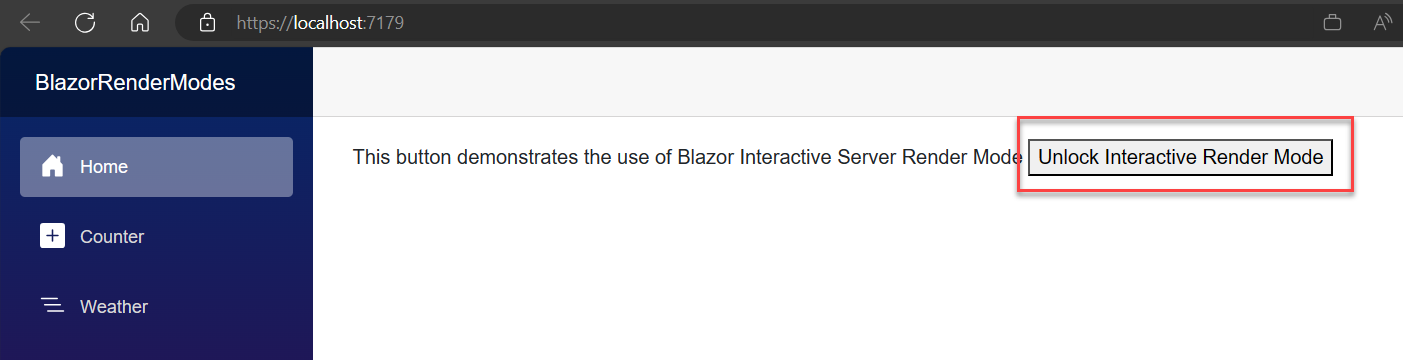
- For those who click on the button, you could be be suprised that nothing is going on. As all seems OK. Nevertheless, bear in mind we specified our Blazor challenge for Interactive Server Render Mode, which implies we have to make some minor replace to the button factor, to make it interactive.
- Navigate again to the code, and replace the
Dwelling.razorfile and, on the second line, proper under the@web pageline, add the next:@rendermode InteractiveServer - Whenever you run the applying once more, and click on the button, the textual content message will properly seem! Nice job!

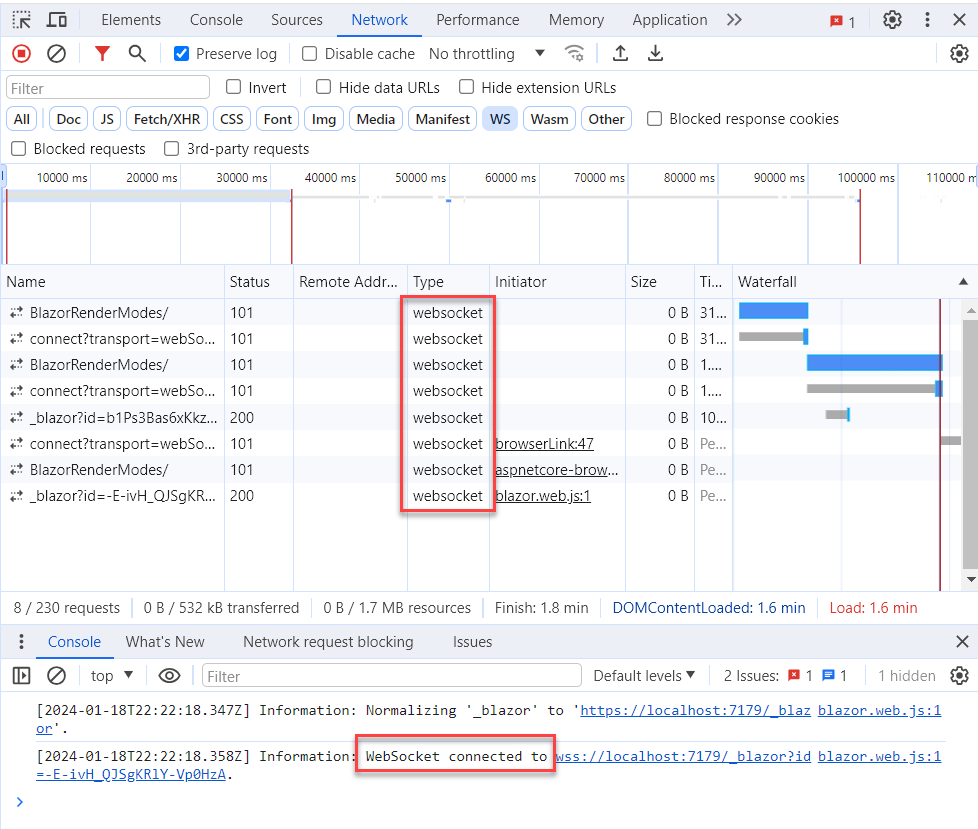
- Opening the Browser Diagnostics Instruments (Examine), and checking the Community additionally reveals us that is an lively websocket connection.
- Now, bear in mind, the Render Mode will be specified per web page or per element. (If you’re questioning what a Blazor element is, consider a piece of an internet web page, like a button, a type, a grid,… that could possibly be loaded as a separate merchandise). To indicate how this may be utilized to a element, replace your
Dwelling.razorfile as follows:@web page "https://www.sitepoint.com/" @* @rendermode InteractiveServer *@the place the
@* *@means “remark out”.
Subsequent, add the Climate desk to the Dwelling Web page format, which is technically a separate web pageClimate.razor, as an object utilizing the up to date code syntax:<span>@unlockmessage</span> <Climate @rendermode=InteractiveServer/> @code { string unlockmessage = ""; - Similar as earlier, we are actually loading the web page, utilizing conventional Static Server Facet Rendering, however specifying to make use of the Interactive Server Render Mode for the
Climateelement. - Save and Run the applying once more. You will note the earlier button is not doing something when clicking it, however the Climate info is properly loading.
In a forthcoming article, we are going to reuse this pattern Blazor Internet App and introduce InteractiveWebAssembly for Consumer-side rendering.
Abstract
In abstract, the brand new Blazor .NET8 render mode gives builders with extra flexibility and management over how their parts are rendered, permitting for improved efficiency and interactivity of their internet functions.
[ad_2]