
[ad_1]
Are you a daily Django consumer? Do you end up desirous to decouple your again finish and entrance finish? Do you wish to deal with knowledge persistence within the API whilst you show the info in a single-page app (SPA) within the browser utilizing a JavaScript framework like React or Vue?
In the event you answered sure to any of those questions, you then’re in luck. This tutorial will take you thru the method of constructing a Django weblog again finish and a Vue entrance finish, utilizing GraphQL to speak between them.
Tasks are an efficient solution to study and solidify ideas. This tutorial is structured as a step-by-step venture so you’ll be able to study in a hands-on means and take breaks as wanted.
On this tutorial, you’ll learn to:
- Translate your Django fashions right into a GraphQL API
- Run the Django server and a Vue utility in your laptop on the similar time
- Administer your weblog posts within the Django admin
- Devour a GraphQL API in Vue to present knowledge within the browser
You’ll be able to obtain all of the supply code you’ll use to construct your Django weblog utility by clicking the hyperlink under:
Demo: A Django Weblog Admin, a GraphQL API, and a Vue Entrance Finish
Weblog functions are a standard starter venture as a result of they contain create, learn, replace, and delete (CRUD) operations. On this venture, you’ll use the Django admin to do the heavy CRUD lifting and also you’ll give attention to offering a GraphQL API to your weblog knowledge.
You’ll use Vue.js 3 and its composition API for the entrance finish of your weblog. Vue allows you to create dynamic interfaces fairly easily, because of its reactive knowledge binding and easy-to-manage elements. Plus, because you’re coping with knowledge from a GraphQL API, you’ll be able to leverage the Vue Apollo plugin.
Right here’s an illustration of the finished venture in motion:
Subsequent, you’ll ensure you have all the required background data and instruments earlier than you dive in and construct your weblog utility.
Mission Overview
For this venture, you’ll create a small running a blog utility with some rudimentary options:
- Authors can write many posts.
- Posts can have many tags and might be both revealed or unpublished.
You’ll construct the again finish of this weblog in Django, full with an admin for including new weblog content material. Then you definitely’ll expose the content material knowledge as a GraphQL API and use Vue to show that knowledge within the browser.
You’ll accomplish this in a number of high-level steps. On the finish of every step, you’ll discover a hyperlink to the supply code for that stage of the venture.
In the event you’re interested in how the supply code for every step appears to be like, then you’ll be able to click on the hyperlink under:
Stipulations
You’ll be finest outfitted for this tutorial if you have already got a stable basis in some internet utility ideas. You need to perceive how HTTP requests and responses and APIs work. You’ll be able to try Python & APIs: A Profitable Combo for Studying Public Information to know the small print of utilizing GraphQL APIs vs REST APIs.
Since you’ll use Django to construct the again finish to your weblog, you’ll wish to be accustomed to beginning a Django venture and customizing the Django admin. In the event you haven’t used Django a lot earlier than, you may additionally wish to attempt constructing one other Django-only venture first. For a very good introduction, try Get Began with Django Half 1: Construct a Portfolio App.
And since you’ll be utilizing Vue on the entrance finish, some expertise with JavaScript will even assist. In the event you’ve solely used a JavaScript framework like jQuery prior to now, the Vue introduction is an effective basis.
Familiarity with JSON can be essential as a result of GraphQL queries are JSON-like and return knowledge in JSON format. You’ll be able to examine Working with JSON Information in Python for an introduction.
Step 1: Set Up the Django Weblog
Earlier than going too far, you’ll want a listing in which you’ll be able to arrange the code to your venture. Open a brand new terminal session and navigate to a folder in your working system the place you retailer your initiatives. Then, create a brand new venture listing. For instance, dvg/, which is brief for Django-Vue-GraphQL:
You’ll even be fully splitting up the entrance finish and again finish code, so it’s a good suggestion to create that separation proper off the bat. Create a back_end/ listing inside your venture listing:
You’ll put your Django code on this listing, so it’s fully remoted from the Vue entrance finish code you’ll create later on this tutorial.
Set up Django
Now you’re prepared to start out constructing the Django utility. To separate the dependencies for this venture out of your different initiatives, create a digital atmosphere wherein you’ll set up your venture’s necessities.
In your terminal, just remember to’re contained in the back_end/ folder you simply created. Then, choose your working system under and use your platform-specific command to arrange a digital atmosphere:
With the above instructions, you create and activate a digital atmosphere named venv through the use of Python’s built-in venv module. The parenthetical (venv) in entrance of the immediate signifies that you just’ve efficiently activated the digital atmosphere.
Word: The remainder of the tutorial assumes you’ll run instructions associated to Python and Django inside your energetic digital atmosphere.
Now that you’ve a digital atmosphere wherein to put in necessities, create a necessities.txt file within the back_end/ listing and outline the primary requirement you’ll want:
When you’ve created the necessities.txt file, use it to put in Django:
Now, you’re prepared to start out creating your Django venture.
Create the Django Mission
Now that Django is put in, use the django-admin command to initialize your Django venture:
Don’t overlook so as to add the dot (.) on the finish of the command above.
The dot prevents Django from making a nested venture listing to your backend venture.
Word: By naming the Django venture backend, you point out the aim of the Django venture. However because you’re already working with a back_end/ folder, you’re naming the Django venture folder backend/ with out an underscore (_) to distinguish these folders.
At this level, your venture listing construction ought to now seem like this:
dvg/
└── back_end/
    ├── handle.py
    ├── necessities.txt
    └── backend/
        ├── __init__.py
        ├── asgi.py
        ├── settings.py
        ├── urls.py
        └── wsgi.py
In your dvg/ venture root, there’s a back_end/ folder that comprises your Django venture. Inside back_end/ there’s a backend/ folder, a handle.py file, and the necessities.txt file. Not proven within the listing tree above is the venv/ folder to your digital atmosphere.
Run Django Migrations
Earlier than you add something particular to your utility, it’s time to run Django’s preliminary migrations. In the event you haven’t handled migrations earlier than, then try Django Migrations: A Primer. Run the migrations with the migrate administration command:
You need to see an extended listing of migrations, every with an OK after it:
Operating the Django migrations will even create an SQLite file named db.sqlite3. That is the database of your venture. Because the identify suggests, it’ll retailer the info to your venture. All of the weblog posts you’ll create through the tutorial might be saved on this file.
Create a Superuser
Now that you’ve the database, you’ll be able to create a superuser. You’ll want this consumer so you’ll be able to ultimately log in to the Django admin interface. Use the createsuperuser administration command to create one:
Operating the createsuperuser administration command prompts you to decide on a username, present an e-mail deal with, and set a password. Use your individual knowledge for these fields and ensure to recollect them. You’ll want these credentials to log in to the Django admin interface in a second.
Step 1 Abstract
Now that you just’ve put in Django, created the Django venture, run the Django migrations, and created a superuser, you’ve gotten a completely functioning Django utility. You need to now have the ability to begin the Django growth server and consider it in your browser. Begin the server utilizing the runserver administration command, which can take heed to port 8000 by default:
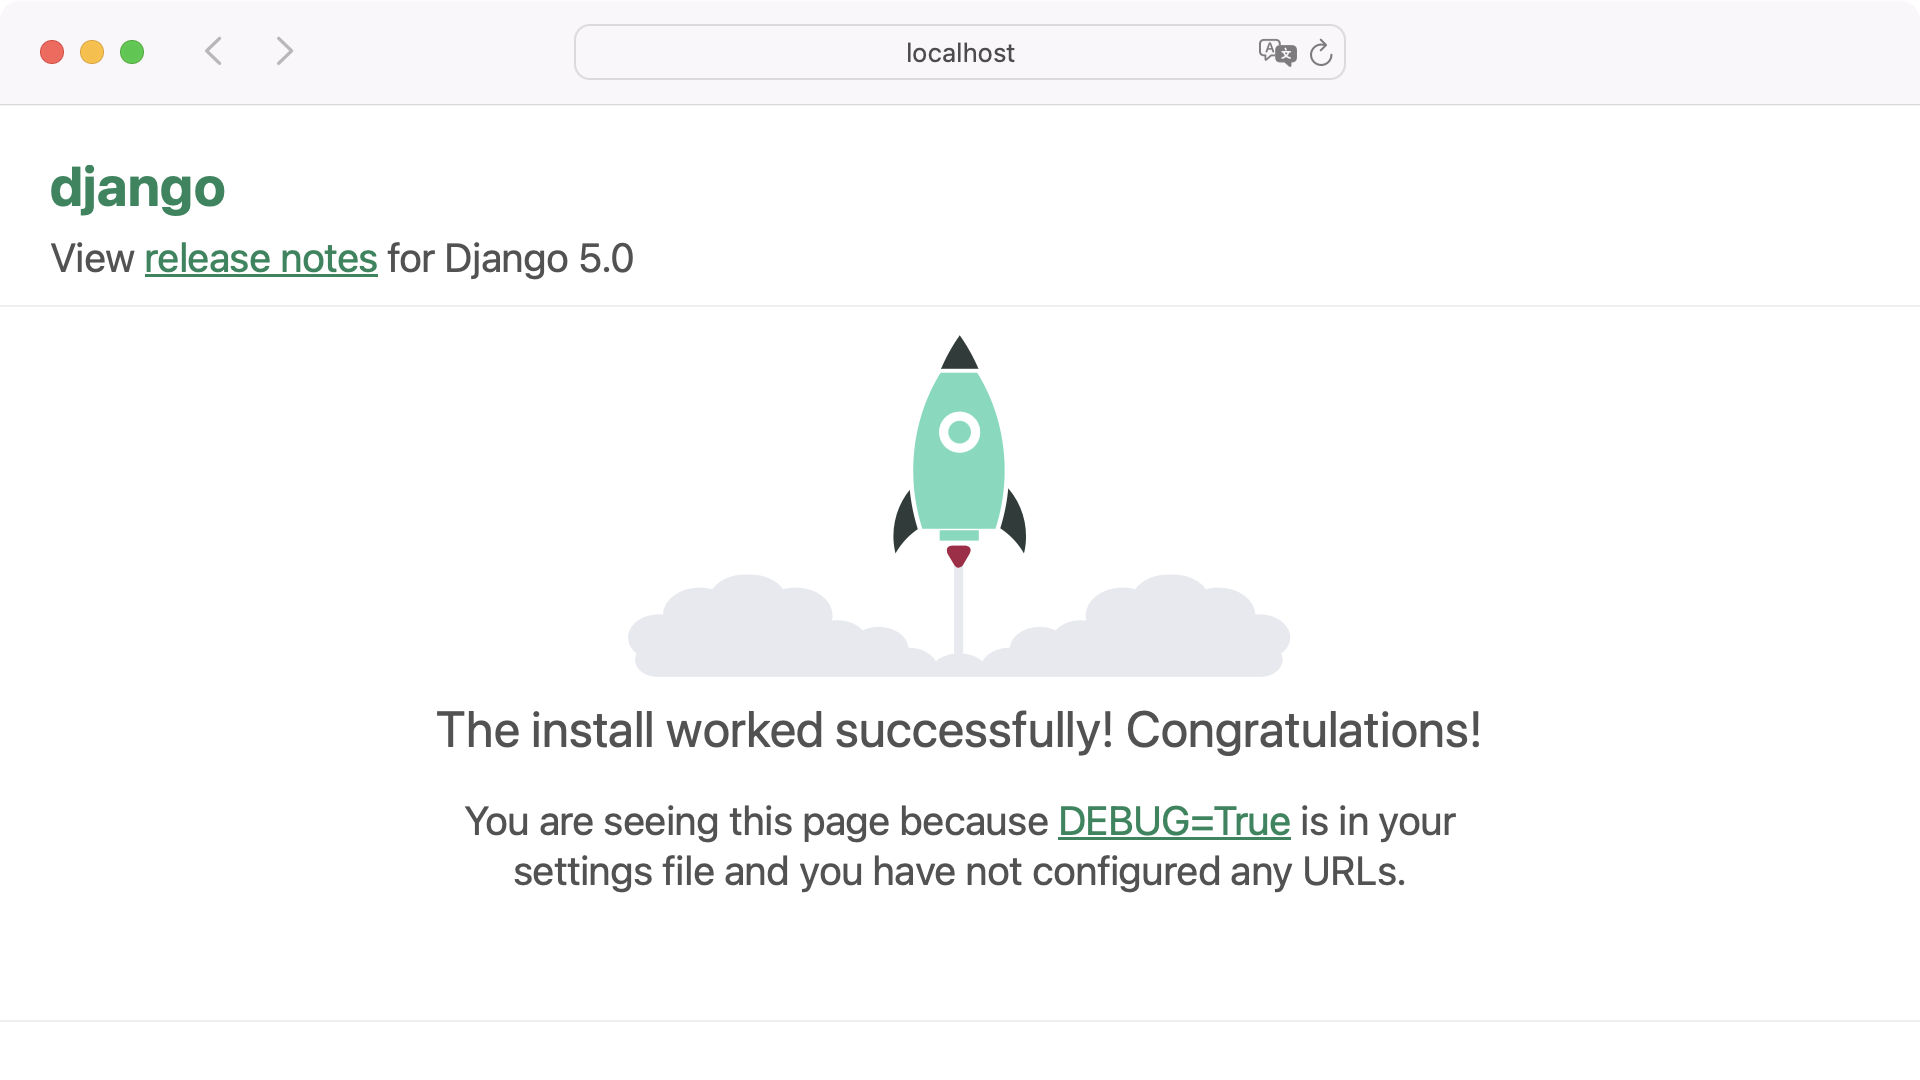
Subsequent, go to http://localhost:8000 in your browser. You need to see the Django splash web page, indicating that the set up labored efficiently:
You also needs to have the ability to go to http://localhost:8000/admin, the place you’ll see a login kind:
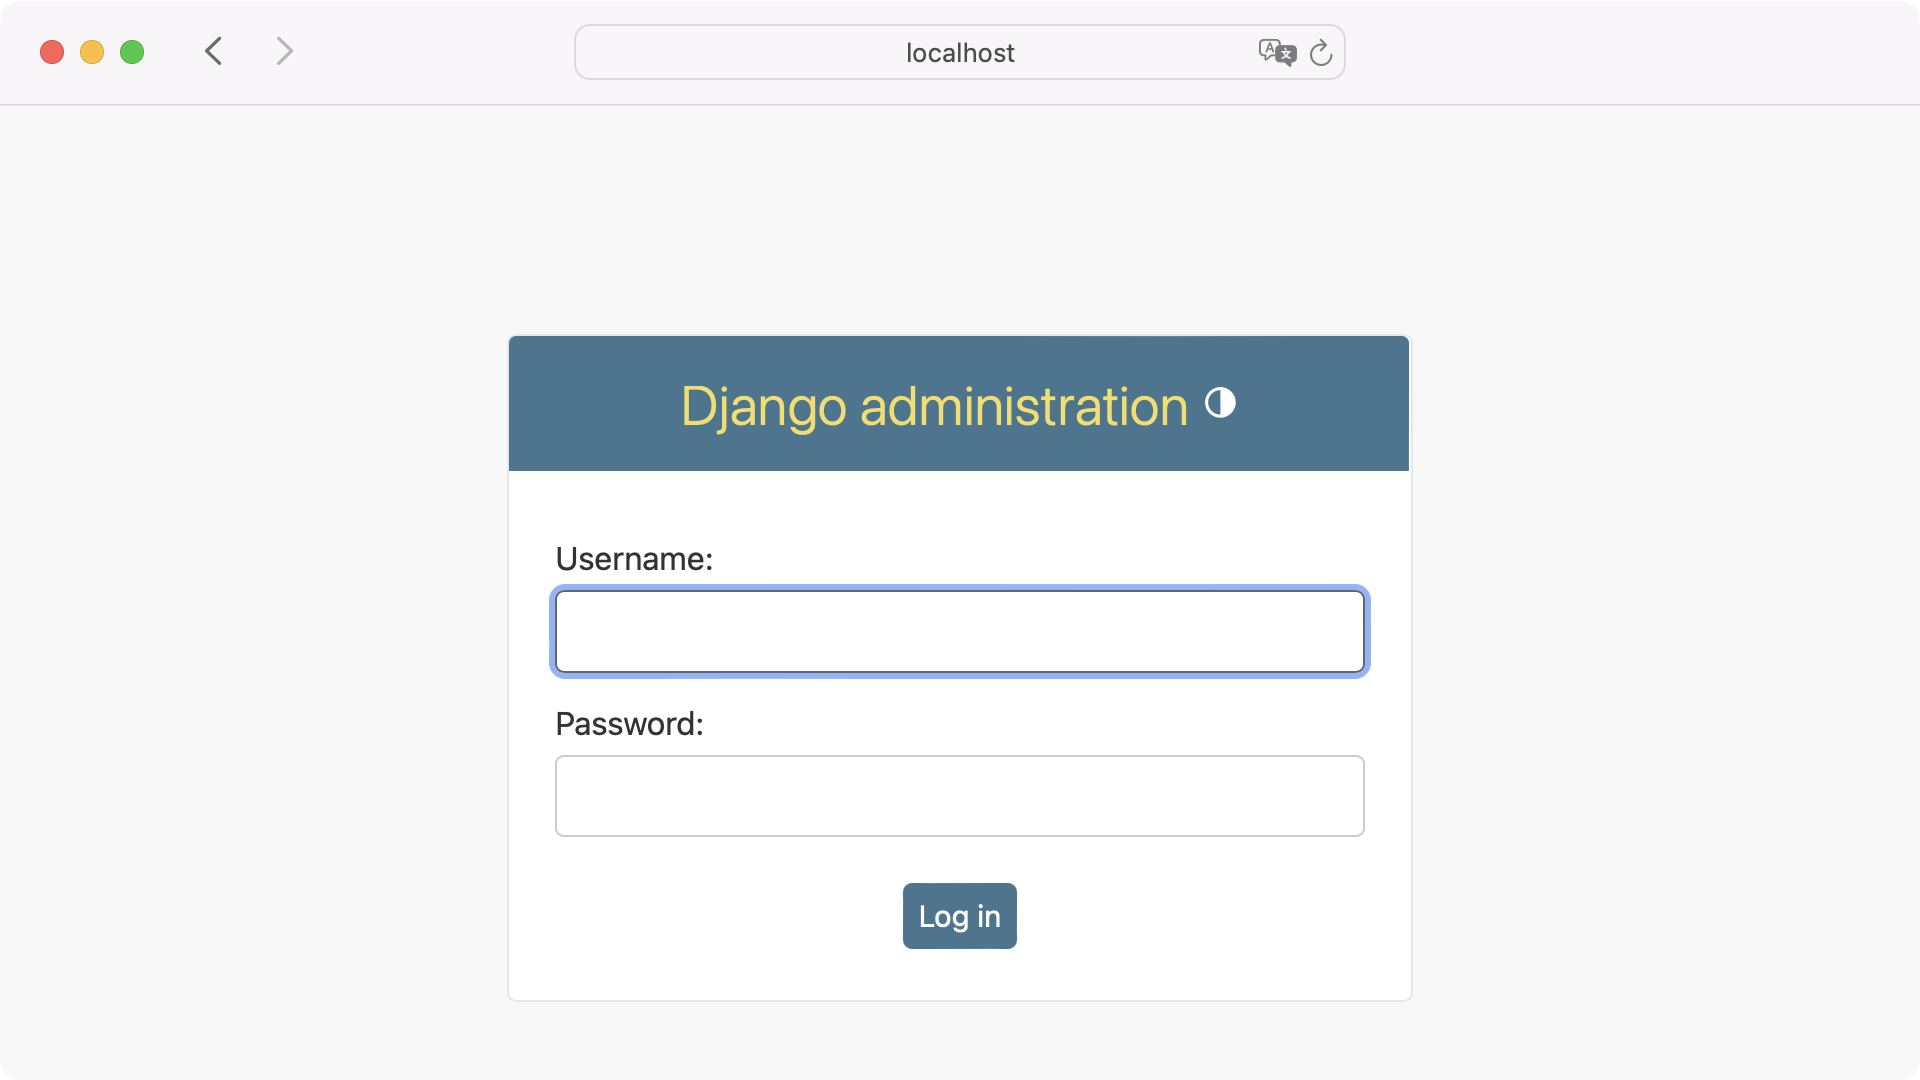
Use the username and password you made to your superuser to log in to the Django admin. If every part’s working, you then’ll be taken to the Django admin interface. This web page might be fairly naked for the second, however you’ll make it way more fascinating within the subsequent step.
Step 2: Create the Django Weblog Admin
Now that you’ve the foundations of your Django venture in place, you’re prepared to start out creating among the core logic to your weblog. On this step, you’ll create the knowledge fashions and the administrative configuration for authoring and managing weblog content material.
Create the Django Weblog Software
Remember that a single Django venture can comprise many Django functions. You need to separate your blog-specific conduct into its personal Django utility in order that it stays distinct from any future functions you construct into your venture. Create the appliance utilizing the startapp administration command:
This may create a weblog/ listing with a number of information, just like those you have already got in backend/:
dvg/
└── back_end/
    ├── handle.py
    ├── necessities.txt
    ├── db.sqlite3
    ├── backend/
    │    └── ...
    └── weblog/
        ├── __init__.py
        ├── admin.py
        ├── apps.py
        ├── migrations/
        │   └── __init__.py
        ├── fashions.py
        ├── exams.py
        └── views.py
You’ll make modifications and additions to a few of these information later on this tutorial. First, you must make some changes within the backend/ venture app.
Allow the Django Weblog Software
Making a Django utility doesn’t make it out there in your venture by default. To verify the venture is aware of about your new weblog utility, you’ll want so as to add it to the listing of put in functions. Replace the INSTALLED_APPS variable in backend/settings.py:
Including "weblog" to the INSTALLED_APPS listing is ample to let Django know in regards to the app. While you explicitly level to the configuration class of your app, then INSTALLED_APPS will assist Django uncover details about your utility, comparable to the info fashions and URL patterns it could comprise.
Create the Django Weblog Information Fashions
Now that Django can uncover your weblog utility, you’ll be able to create the knowledge fashions. You’ll create three fashions to start out:
Profileshops further details about weblog customers.Tagrepresents a class wherein weblog posts might be grouped.Submitshops the content material and metadata of every weblog publish.
You’ll add every of those fashions to weblog/fashions.py. Every of your fashions will inherit from Django’s fashions.Mannequin class.
The Profile Mannequin
The Profile mannequin can have three fields that comprise consumer data:
consumeris a one-to-one affiliation to the Django consumer with which the profile is related.web siteis an non-compulsory URL the place you’ll be able to study extra in regards to the consumer.biois an non-compulsory quick textual content in regards to the consumer.
Open weblog/fashions.py and add an import for the settings module:
Then create the Profile mannequin, which ought to seem like the next snippet:
The .__str__() technique will make the Profile objects you create present the username on the admin web site.
The Tag Mannequin
When making a weblog publish, you’ll have the ability to add tags to the publish. These tags will enable your readers to filter weblog posts by a selected tag later.
The Tag mannequin has only one subject, identify, which shops a brief, distinctive identify for the tag. Create the Tag mannequin, which ought to seem like the next snippet:
Once more, .__str__() will make the Tag objects you create seem in a extra human-friendly means on the admin web site.
The Submit Mannequin
The guts and middle of any weblog are the weblog posts. The Submit mannequin is essentially the most concerned as a result of it represents the precise weblog publish with the content material you write and the meta data you add. It’s going to have a number of fields:
| Area Identify | Objective |
|---|---|
title |
The distinctive title of the publish to show to readers |
subtitle |
An non-compulsory clarifier of the publish’s content material to assist readers resolve in the event that they wish to learn it |
slug |
A novel, readable identifier for the publish to make use of in URLs |
physique |
The publish’s content material |
meta_description |
An non-compulsory description to make use of for search engines like google like Google |
date_created |
A timestamp of the publish’s creation |
date_modified |
A timestamp of the publish’s most up-to-date edit |
publish_date |
An non-compulsory timestamp when the publish goes reside |
revealed |
Exhibits whether or not the publish is at present out there to readers |
writer |
A reference to the profile of the consumer who wrote the publish |
tags |
The listing of tags related to the publish, if any |
As a result of blogs normally present the latest posts first, you’ll additionally need the ordering to be by revealed date, displaying the latest first. Create the Submit mannequin, which ought to seem like the next snippet:
The on_delete=fashions.PROTECT argument for writer ensures that you just gained’t by accident delete an writer who nonetheless has posts on the weblog. The ManyToManyField relationship to Tag permits you to affiliate a publish with zero or extra tags. Every tag might be related to many posts.
Create the Mannequin Admin Configuration
Now that your fashions are in place, you’ll want to inform Django how they need to be displayed within the admin interface. In weblog/admin.py, begin by importing Django’s admin module and your fashions:
Then, create and register the admin courses for Profile and Tag, which solely want the mannequin specified:
Identical to the mannequin, the admin class for Submit is extra concerned. Posts comprise a variety of data, so it helps to be extra considered about what data you show to keep away from crowding the interface:
To make shopping and modifying posts extra fluid, you customise a publish’s particulars with these particular variables:
list_display: Solely present the precise details about every publish.list_filter: Permit filtering the publish listing by posts which are revealed or unpublished, and by publish date.list_editable: Permit modifying of all of the displayed fields, except for the ID.search_fields: Permit trying to find posts utilizing the title, subtitle, slug, and physique.prepopulated_fields: Prepopulate the slug subject utilizing the title and subtitle fields.date_hierarchy: Use the publish date of all posts to create a browsable date hierarchy.save_on_top: Present a button on the high of the listing to avoid wasting modifications.
You’ll be able to learn extra about all of the choices the Django admin has to supply in Customise the Django Admin With Python.
Create the Mannequin Migrations
Django has all the data it must administer and persist your weblog content material, however you’ll must replace the database to assist these modifications. Earlier on this tutorial, you ran Django’s migrations for its built-in fashions. Now, you’ll create and run migrations to your fashions.
First, create the migrations utilizing the makemigrations administration command:
This creates a migration whose identify is 0001_initial.py by default. Run this migration utilizing the migrate administration command:
You now have your entire knowledge fashions in place, and also you’ve configured the Django admin so as to add and edit these fashions.
Begin Running a blog
Begin the Django growth server once more for those who stopped it earlier than to run the migrations. Then, go to the admin interface at http://localhost:8000/admin, and discover what’s modified.
You need to see hyperlinks to the listing of tags, profiles, and posts, in addition to hyperlinks so as to add or edit every of them. Attempt to add your individual posts now and edit just a few to see how the admin interface responds:
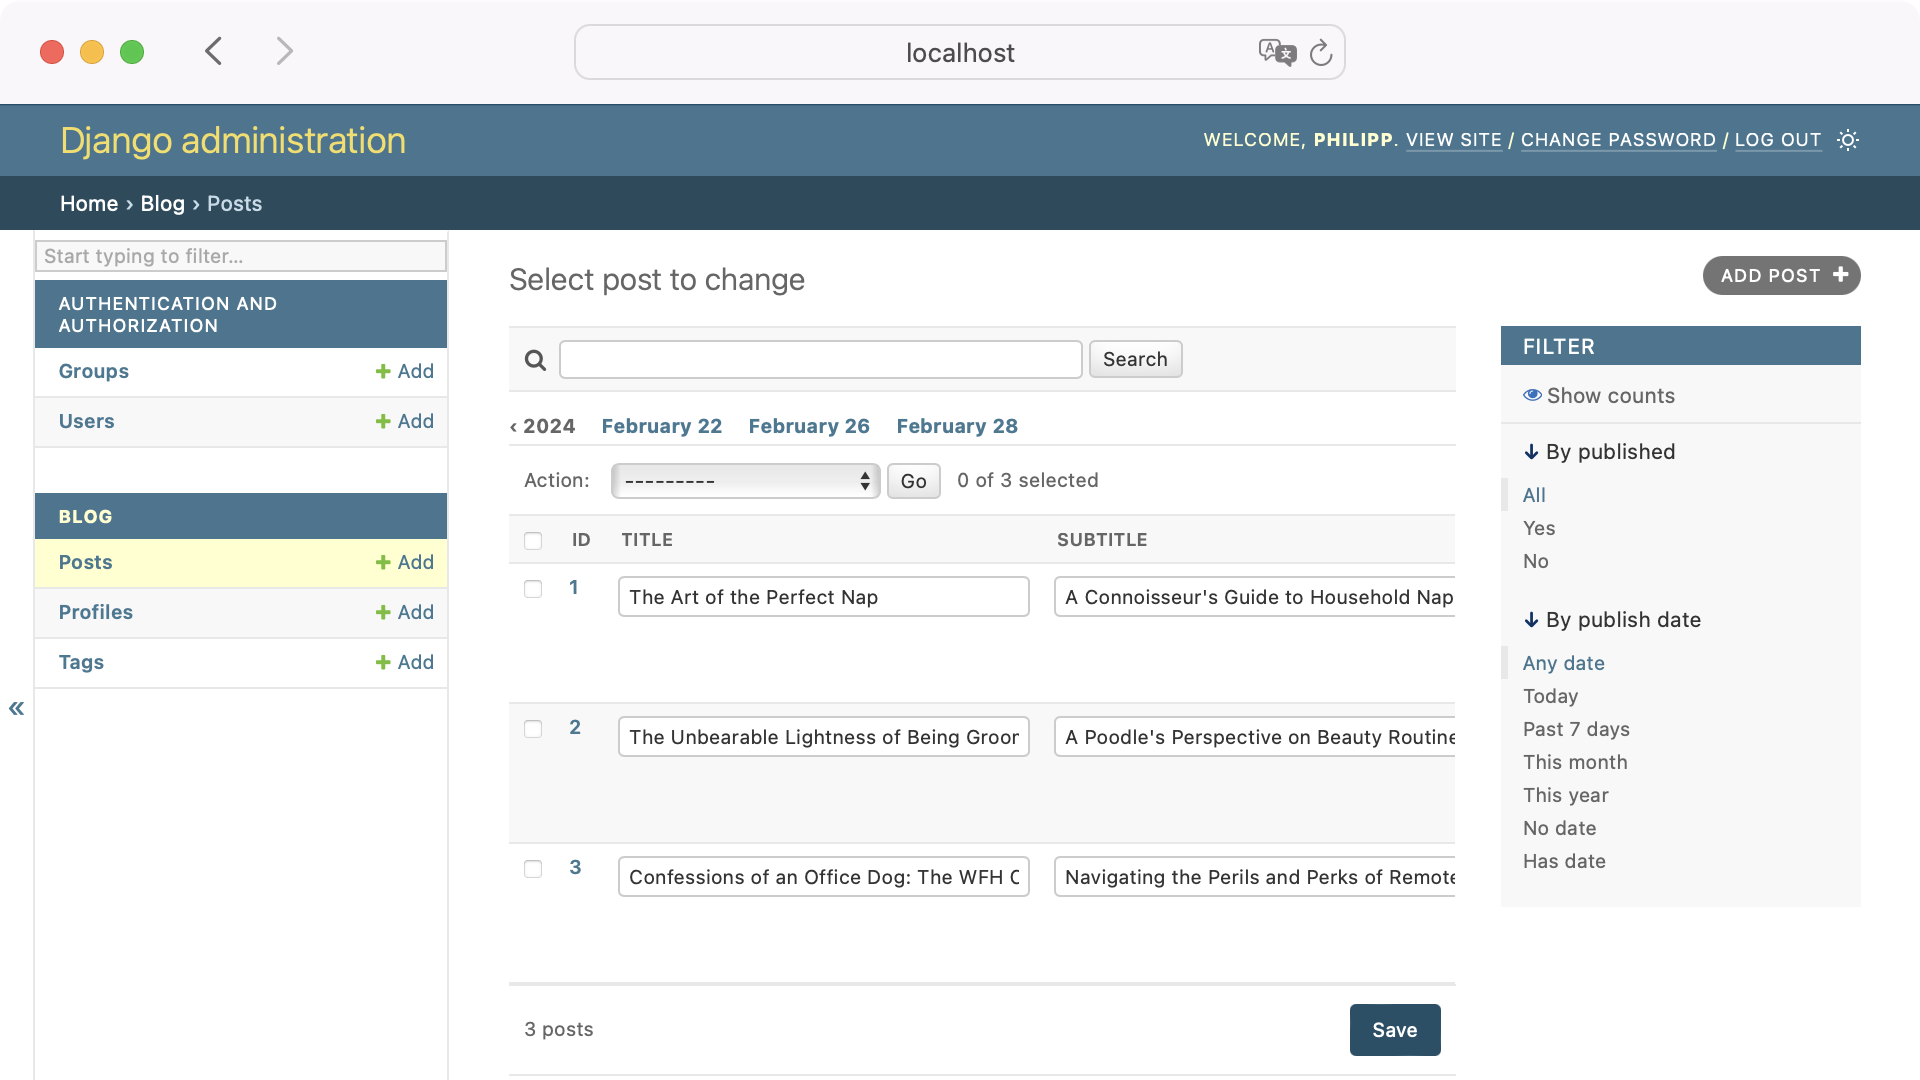
Earlier than you proceed with the following steps, it is best to have round three weblog posts saved in your weblog. Just be sure you even have just a few tags connected to them.
Step 2 Abstract
At this level, you’ve accomplished sufficient of the again finish that you might resolve to go headlong within the Django path. You can use Django’s URL routing and templating engine to construct pages that might present all of the publish content material you create within the admin to readers.
As an alternative, you’ll wrap the again finish you’ve created in a GraphQL API so you’ll be able to ultimately eat it from the browser and supply a richer client-side expertise.
Step 3: Set Up Graphene-Django
GraphQL permits you to retrieve solely the info you want, which might be helpful in comparison with very massive responses which are frequent in RESTful APIs. GraphQL additionally gives extra flexibility in projecting knowledge, so you’ll be able to usually retrieve knowledge in new methods with out altering the logic of the service offering the GraphQL API.
You’ll use Graphene-Django to combine what you’ve created to this point right into a GraphQL API.
Set up Graphene-Django
To get began with Graphene-Django, first add it to your venture’s necessities file:
Then set up it utilizing the up to date necessities file:
Add "graphene_django" to the INSTALLED_APPS variable in your venture’s settings.py module so Django will discover it:
After putting in third social gathering Django apps like Graphene-Django with pip, you must add it to your venture by itemizing it in your INSTALLED_APPS. Now that Django is aware of about "graphene_django", you’ve acquired some configuration to do.
Configure Graphene-Django
To get Graphene-Django working in your venture, you’ll must configure just a few items:
- Replace
settings.pyso the venture is aware of the place to search for GraphQL data. - Add a URL sample to serve the GraphQL API and GraphiQL, GraphQL’s explorable interface.
- Create the GraphQL schema so Graphene-Django is aware of how one can translate your fashions into GraphQL.
Replace Django Settings
The GRAPHENE setting configures Graphene-Django to look in a selected place to your GraphQL schema. In settings.py, level SCHEMA to the weblog.schema.schema Python path, which you’ll create shortly:
Word that this addition might trigger Django to supply an import error, which you’ll resolve while you create your GraphQL schema.
Add a URL Sample for GraphQL and GraphiQL
To let Django serve the GraphQL endpoint and the GraphiQL interface, you’ll add a brand new URL sample to backend/urls.py. You’ll level the URL at Graphene-Django’s GraphQLView. Since you’re not utilizing the Django template engine’s cross-site request forgery (CSRF) safety options, you’ll additionally must import Django’s csrf_exempt decorator to mark the view as exempt from CSRF safety:
The graphiql=True argument tells Graphene-Django to make the GraphiQL interface out there.
Create the GraphQL Schema
Now you’ll create the GraphQL schema, which ought to really feel just like the admin configuration you created earlier. The schema consists of a number of courses which are every related to a selected Django mannequin and one to specify how one can resolve just a few essential sorts of queries you’ll want within the entrance finish.
Create a brand new schema.py module within the weblog/ listing. Import Graphene-Django’s DjangoObjectType, your weblog fashions, and get_user_model(), which supplies you entry to the Django Consumer mannequin:
Then, create a corresponding class for every of your fashions and the Consumer mannequin. They need to every have a reputation that ends with Kind as a result of each represents a GraphQL sort. Your courses ought to seem like the next:
Moreover, you want a Question class that inherits from graphene.ObjectType. This class will convey collectively all the sort courses you created. To set this up, import graphene and add strategies to Question to point how your fashions might be queried:
The Question class in line 9 is made up of a lot of attributes which are both graphene.Record or graphene.Area. You employ graphene.Area if the question ought to return a single merchandise and graphene.Record if it can return a number of gadgets.
For every of those attributes, you additionally create a technique to resolve the question:
- Line 16: Obtain all of the posts.
- Line 23: Get an writer with a given username.
- Line 28: Get a publish with a given slug.
- Line 35: Obtain all posts by a given writer.
- Line 42: Obtain all posts with a given tag.
You resolve a question by taking the data provided within the question and returning the suitable Django queryset in response.
Word: The tactic for every resolver should begin with resolve_, and the remainder of the identify ought to match the corresponding attribute. For instance, the tactic to resolve the queryset for the all_posts attribute in line 16 should be named resolve_all_posts.
You now have all the categories and resolvers to your schema, however do not forget that the GRAPHENE variable you created in backend/settings.py factors to weblog.schema.schema. Create a schema variable on the finish of schema.py that wraps your Question class in graphene.Schema to tie all of it collectively:
This variable matches the "weblog.schema.schema" worth you configured for Graphene-Django earlier on this tutorial.
Step 3 Abstract
You’ve fleshed out your weblog’s knowledge mannequin, and now you’ve additionally wrapped your knowledge mannequin with Graphene-Django to serve that knowledge as a GraphQL API.
Run the Django growth server and go to http://localhost:8000/graphql:
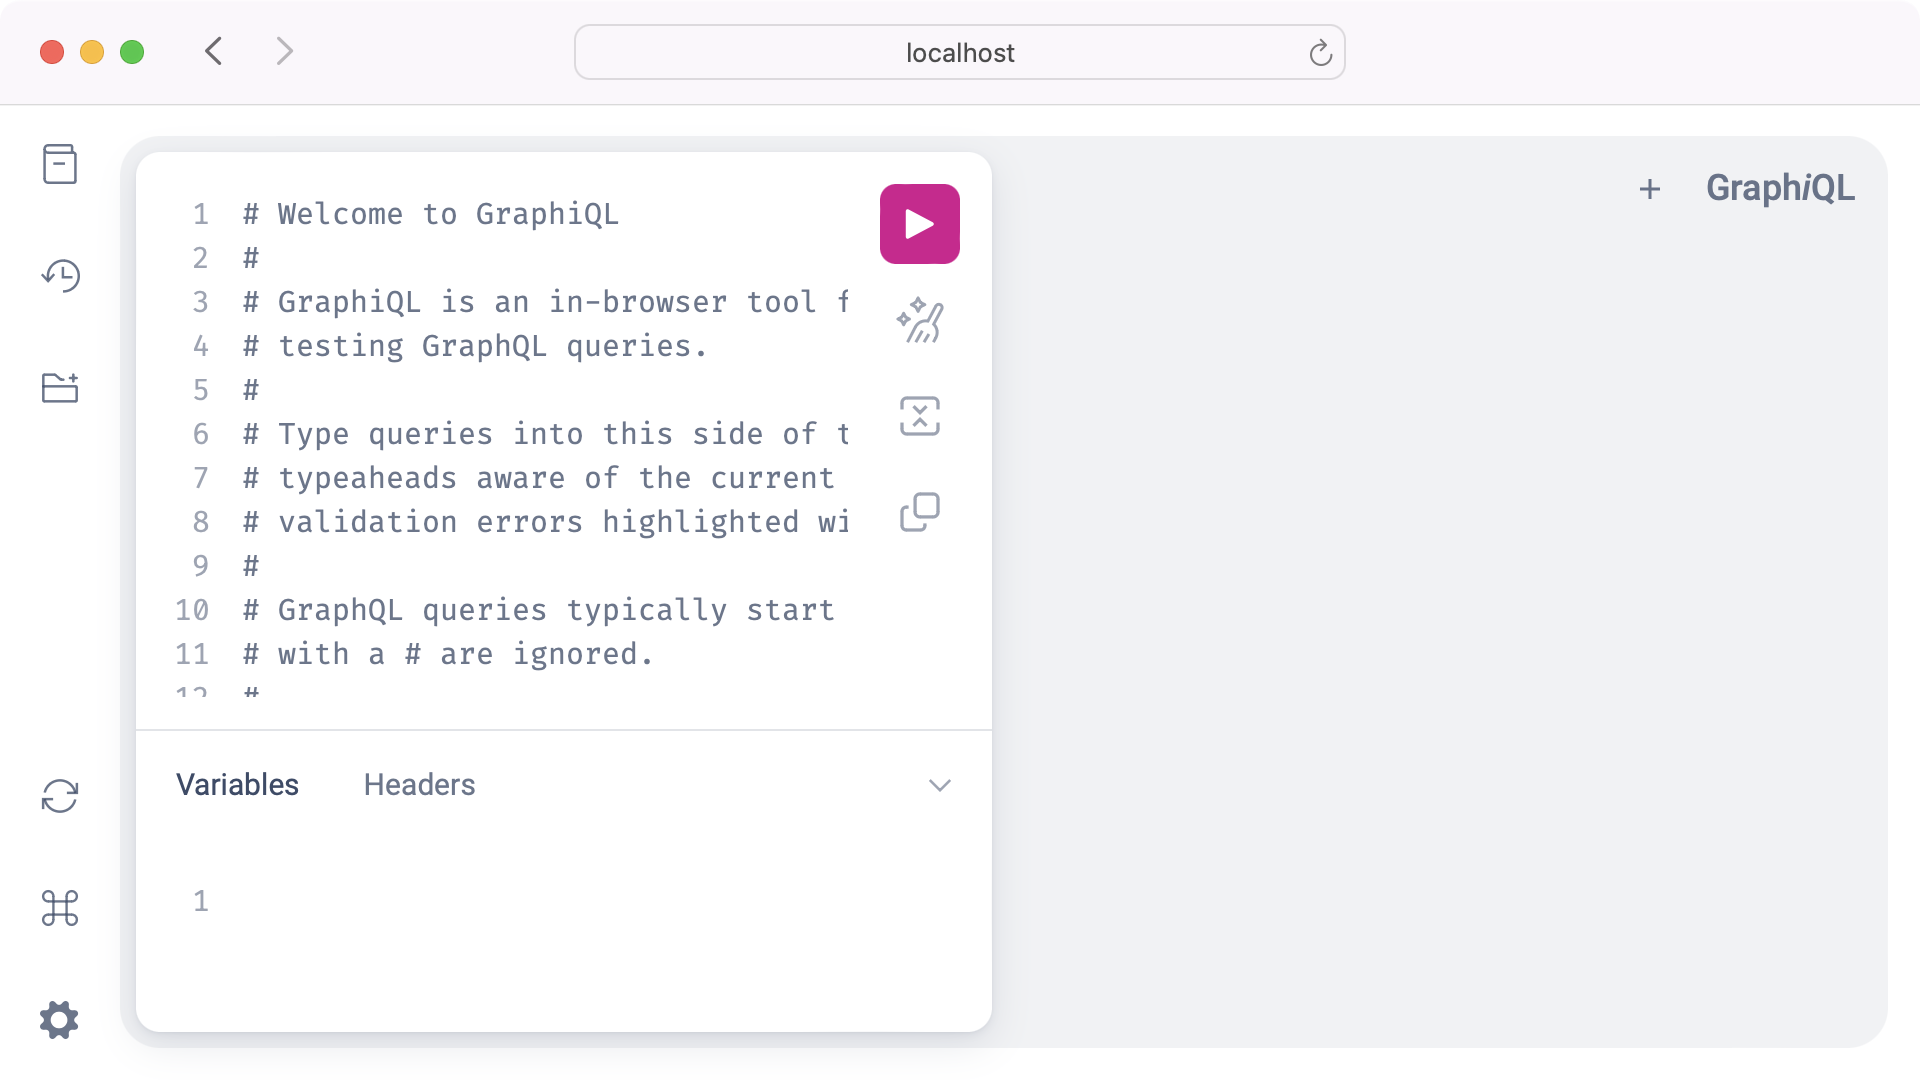
You need to see the GraphiQL interface with some commented textual content that explains how one can use the instrument.
Increase the Docs part within the high left of the display screen and click on question: Question. You need to see every of the queries and kinds that you just configured in your schema:
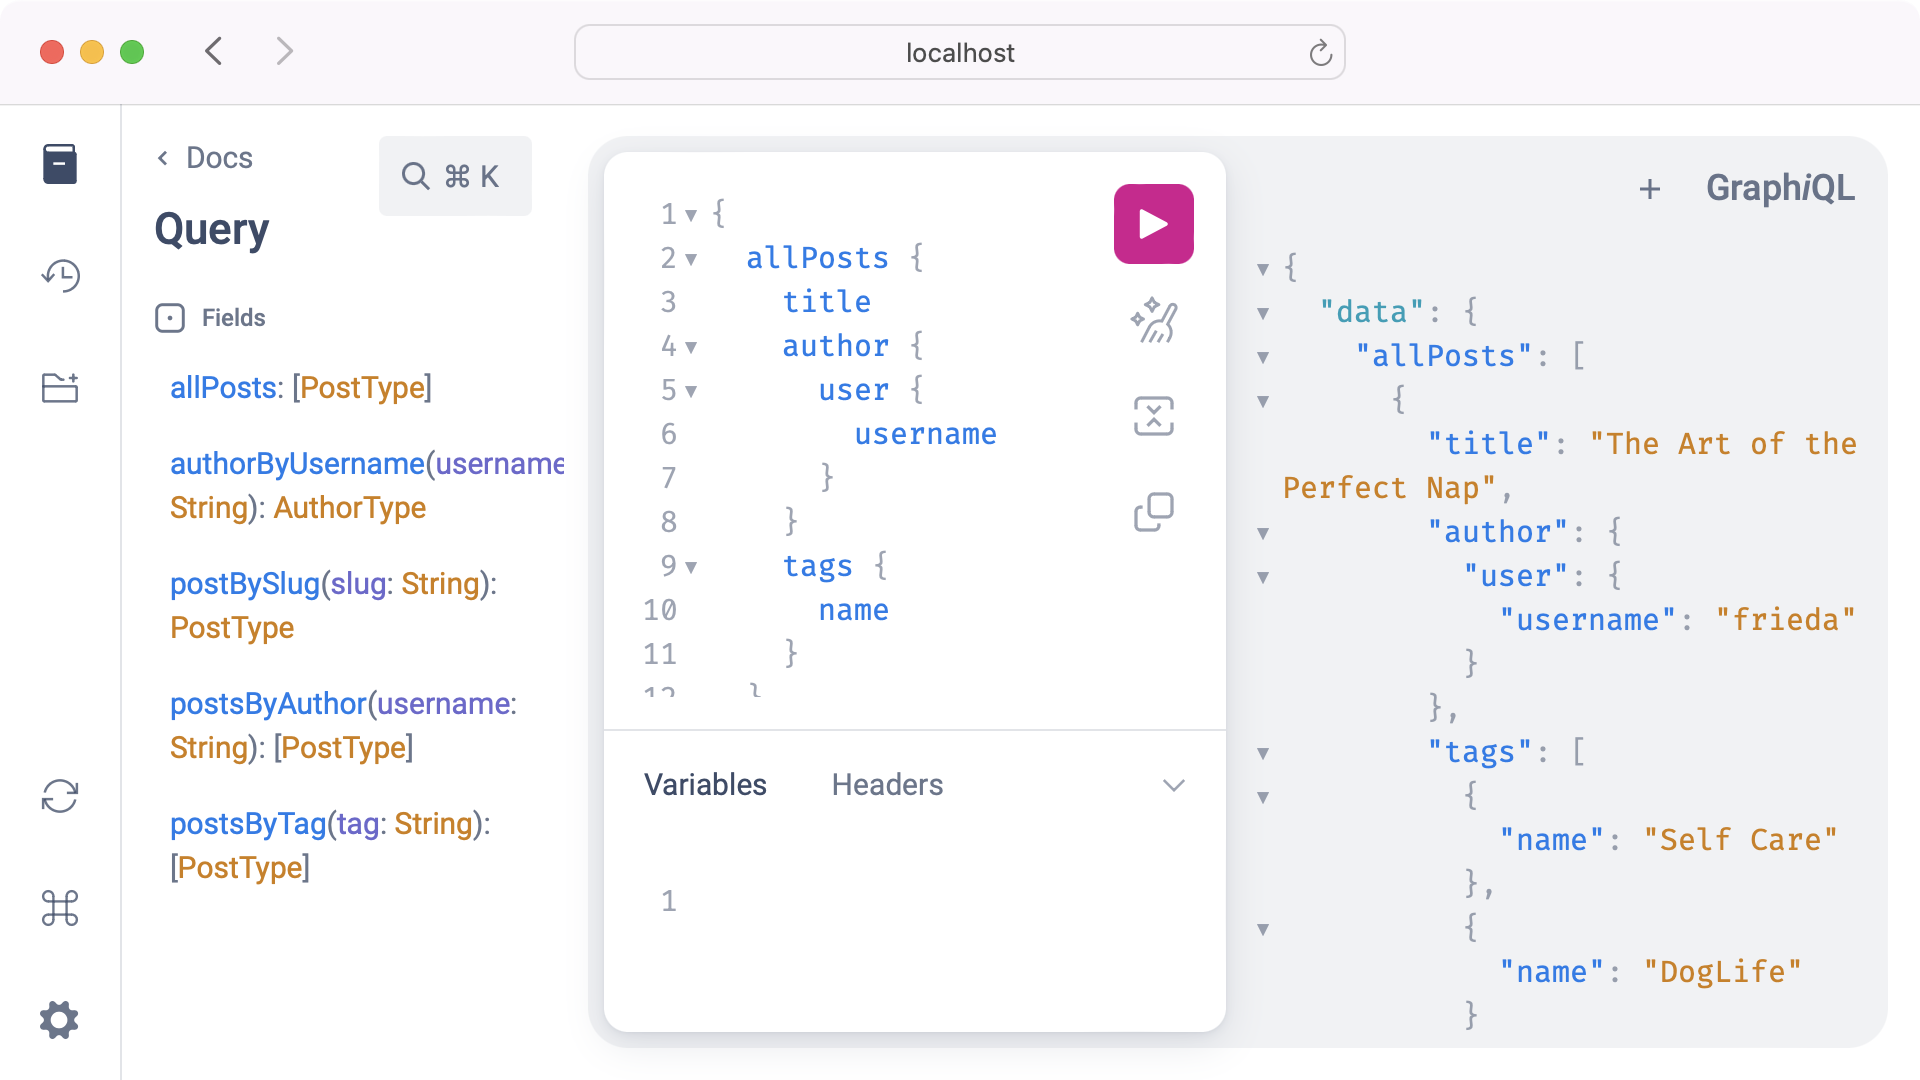
In the event you haven’t created any take a look at weblog content material but, achieve this now. Strive the next question, which ought to return an inventory of all of the posts you’ve created:
The response ought to return an inventory of posts. The construction of every publish ought to match the form of the question, like within the following instance:
The response you get ought to match the posts that you just created to this point.
In the event you’ve saved some posts and see them within the response, you then’re able to proceed on.
You’ll must take another step earlier than you’ll be able to name the again finish work full. As a result of the again finish and the entrance finish will run on totally different ports regionally, and since they may run on totally separate domains in a manufacturing atmosphere, cross-origin useful resource sharing (CORS) comes into play. With out dealing with CORS, requests from the entrance finish to the again finish will typically be blocked by your browser.
The django-cors-headers venture makes coping with CORS pretty painless. You’ll use this to inform Django to reply to requests even when they arrive from one other origin, which can enable the entrance finish to speak correctly with the GraphQL API.
First, add django-cors-headers to your necessities file:
Then set up it utilizing the up to date necessities file:
Add "corsheaders" to the INSTALLED_APPS listing in your venture’s settings.py module:
Keep in settings.py and add "corsheaders.middleware.CorsMiddleware" to the start of the MIDDLEWARE listing:
The django-cors-headers documentation suggests placing the middleware as early within the MIDDLEWARE listing as potential. In the event you don’t wish to put the CORS middleware on the very high of the listing, then you must at the very least be sure that to place it earlier than Django’s CommonMiddleware.
CORS exists for a very good purpose. You don’t wish to expose your utility so it may be used from wherever on the Web. To outline how a lot you wish to open up the GraphQL API, you could use certainly one of these three settings:
CORS_ALLOWED_ORIGINS: An inventory of domains from which your Django utility will enable requests.CORS_ALLOWED_ORIGIN_REGEXES: An inventory of common expressions that match domains from which to permit requests.CORS_ALLOW_ALL_ORIGINS: A Boolean worth that defines whether or not Django needs to be all open or all closed by default.
For this venture, CORS_ALLOWED_ORIGINS is ample.
Add the next settings to settings.py:
This setting will enable requests solely out of your entrance finish, which you’ll create later and which can run on port 5173 regionally.
Step 4 Abstract
Congratulations, you’ve accomplished the again finish of your weblog! You’ve got a working knowledge mannequin, a working admin interface, a working GraphQL API that you would be able to discover utilizing GraphiQL, and the power to question the API from the entrance finish you’ll construct subsequent. It is a good spot to pause for those who haven’t taken a break shortly.
Step 5: Set Up Vue.js
You’ll use Vue because the entrance finish to your weblog. To arrange Vue, you’ll set up Node.js in your system after which create the Vue venture. In your venture, you’ll set up a few essential plugins, and run one other growth server to ensure your utility and its dependencies are working collectively correctly.
Set up Node.js
Earlier than you’ll be able to work with Vue you could set up Node.js. Node.js is a JavaScript runtime atmosphere that lets you run JavaScript outdoors of your browser.
Identical to Python and pip, Node.js gives a package deal supervisor. The Node Bundle Supervisor is called npm and also you’ll use it in a second to put in Vue and a few further plugins.
Word: Please navigate to the official Node.js obtain web page to obtain and set up Node.js in your working system earlier than persevering with with this tutorial.
To confirm that Node.js and npm can be found in your working system, open a brand new terminal window and examine their variations with the instructions under:
When you’ve verified that Node.js and npm are current, hold your terminal window open and navigate to your venture listing:
The dvg/ listing is the start line to initialize your Vue venture.
Create the Vue Mission
Very similar to Django’s startproject command, the create-vue instrument lets you construct your venture construction. Much more so, it asks you a bunch of inquiries to fine-tune your setup. If you wish to observe alongside carefully with this tutorial, then it is best to reply the questions like this:
| Immediate | Choice |
|---|---|
| Mission identify: | front_end |
| Add TypeScript? | No |
| Add JSX Help? | No |
| Add Vue Router for Single Web page Software growth? | Sure |
| Add Pinia for state administration? | No |
| Add Vitest for Unit Testing? | No |
| Add an Finish-to-Finish Testing Resolution? | No |
| Add ESLint for code high quality? | No |
An important choices are naming your venture “front_end” and including Vue Router to the venture.
To start out the scaffolding course of, run this command in your venture listing:
After you’ve initated the method, you must set up the create-vue instrument. Then, you must reply a number of questions in regards to the tooling of your Vue venture. Once more, be sure that to call your venture “front_end” and so as to add Vue Router to the venture
The scaffolding course of creates a front_end/ listing alongside your current back_end/ listing, installs a lot of JavaScript dependencies, and creates some skeleton information for the appliance:
front_end/
│
├── public/
│   └── ...
│
├── src/
│   │
│   ├── property/
│   │   └── ...
│   │
│   ├── elements/
│   │   └── ...
│   │
│   ├── router/
│   │   └── index.js
│   │
│   ├── views/
│   │   ├── AboutView.vue
│   │   └── HomeView.vue
│   │
│   ├── App.vue
│   └── primary.js
│
├── README.md
├── index.html
├── jsconfig.json
├── package deal.json
└── vite.config.js
Along with the information and folders proven above, you can even discover a .vscode/ folder with really useful Visible Studio Code extensions and a .gitignore file that comprises some default information chances are you’ll wish to ignore when working with Git.
Step 5 Abstract
The front_end/ folder would be the root folder for the entrance finish a part of your venture. You’ll run all upcoming instructions from inside this listing or its subfolders.
Transfer into the front_end/ folder and set up all dependencies to your Vue venture:
Ensure that so as to add the --include dev flag to the npm set up command to additionally set up growth dependencies like Vite.
Along with your venture construction in place and all dependencies put in, you’ll be able to run the Vite growth server:
By default, your Vite server runs on port 5173. If this port is already in use, then Vite appears to be like for one more port. In that case, you’ll get a message within the terminal output.
Word: In case your Vite server runs on a unique port, then you could alter the URL you set for CORS_ALLOWED_ORIGINS within the settings.py of your Django venture.
You now have your Django utility operating at http://localhost:8000 and your Vue utility operating at http://localhost:5173. Now go to http://localhost:5173 in your browser:

You need to see the Vue splash web page, which signifies that you just’ve put in every part efficiently. In the event you see the splash web page, you’re prepared to start out creating a few of your individual views and elements.
Step 6: Create Primary Views and Parts
Now that you just’ve acquired Vue up and operating, you can begin creating elements. Parts are the constructing blocks to your entrance finish:
Parts enable us to separate the UI into impartial and reusable items, and take into consideration every bit in isolation. It’s frequent for an app to be organized right into a tree of nested elements. (Supply)
The elements you’ll create first are the views to see your Posts and Authors. The views are information that you just’ll load together with your routes later. Earlier than you create your first views, there’s a bit of unpolluted as much as do.
Take away Present Views
The create-vue instrument is useful to create your venture construction. It creates information that can provide you a very good start line on how one can create your individual Vue venture information. So that you don’t confuse your new information with the prevailing ones, it’s a good suggestion to scrub up the venture first.
Word: When you clear up your Vue venture and work on new information, the Vite server will throw some errors. You’ll be able to ignore them for now. On the finish of this step, you’ll have every part arrange so the Vite server runs error-free once more.
There are two default views within the src/views/ listing that you must take away:
HomeView.vueAboutView.vue
When you’ve deleted each information, you’ll be able to keep in the identical listing. The src/views/ listing is the place you’ll create your views subsequent.
Add Your Views
Your weblog can have 4 views. Begin with AuthorView.vue. This file is a Vue Single-File Part (SFC). SFCs comprise HTML, JavaScript, and CSS blocks that bundle view, logic, and styling:
You’ll be able to order the blocks anyway you want. However generally you begin with the <script> block. Right here, you import any elements that your SFC makes use of. On this case, the PostList part that you just’ll create later.
The HTML should be positioned inside a <template> block. For the elements that you just wish to render you utilize customized HTML tags.
The CSS inside <model> is scoped. Which means any styling you outline in a SFC will solely have an effect on components in the identical file. Even youngster elements don’t inherit this styling by default.
Subsequent, create the AllPostsView.vue file with the code under:
Identical to in AuthorView.vue you import PostList and render it in your HTML block. For now, AllPostsView appears to be like just like AuthorView, however you’ll alter it later. To distinguish between views, you’ll be able to change the headline and the headline’s coloration.
The third view may be very related once more. Create PostsByTagView.vue contained in the views/ folder and add the code under:
The final view you create is called PostView.vue. Because the identify suggests, this view will comprise a single publish of your weblog:
On this view, you import an AuthorLink part. Identical to the elements that you just imported within the former views, this part doesn’t exist but. Earlier than you create this, it’s time for one more small cleanup.
Take away Present Parts
In the event you navigate to the elements/ folder inside your src/ folder, then you’ll be able to see that there are some information and an icons/ folder current already. Go on and delete the icons/ folder with its contents, and these three information:
WelcomeItem.vueTheWelcome.vueHelloWorld.vue
With a clear elements/ folder, you’ll be able to go on and create the elements you referenced in your views.
Create Your Parts
On this part, you’ll create the 2 elements that you just want to your weblog. Once more, you’ll hold them fundamental for now and gained’t add any particular content material to them simply but.
Begin with the part that’ll show an writer’s hyperlink later. To take action, create a file named AuthorLink.vue within the elements/ folder:
For now, that’s all of the code you must confirm that the part renders appropriately. You’ll add extra content material to it later.
Subsequent, create PostList.vue in the identical folder:
In PostList, you additionally render AuthorLink. You’ll be able to import elements as constructing blocks wherever you want them.
Set Up Routes
In the event you’d go to http://localhost:5173 proper now, you’d nonetheless get an error. In the intervening time, the Vite server nonetheless appears to be like for the default views that Vue created through the scaffolding course of.
To repair the incorrect routes and arrange routes to your new views, open the prevailing index.js file in src/router/. Change the content material with the code under:
Now that your routes level to current views, all of the errors in your Vite server output needs to be gone. To conveniently bounce between the totally different pages, add the route hyperlinks to the App.vue file.
The App.vue file is the bottom part that your Vue app appears to be like for. You could find it prominently positioned immediately within the src/ folder.
Word: If you wish to clear up your Vue venture much more, then you can even take away the emblem.svg file contained in the src/property/ folder at this level.
Open App.vue and substitute the prevailing content material with the content material under:
You’ll be able to reference Vue routes both by their path or their identify. Later, you’ll take away the hyperlinks right here once more since you’ll hyperlink to the routes from inside your content material. However for now, including routes to the navigation is useful to see if every part works.
Step 6 Abstract
On this step, you cleaned up components of your Vue venture folders and created your individual views and elements. With all routes in place, you’ll be able to open http://localhost:5173 in your browser and take a look at how your elements render:
Good! Now that you just’ve verified that you would be able to entry your views within the browser and that your elements render appropriately, you’ll be able to transfer on and add extra helpful content material to your elements.
Step 7: Replace the Vue Parts
Your elements will ultimately show knowledge from the GraphQL endpoint. In the intervening time, you’ll simply make them show some static content material. With the desk under, you’ll be able to confirm that every one your elements are current:
| Folder | Filename |
|---|---|
src/ |
App.vue |
src/elements/ |
AuthorLink.vue |
src/elements/ |
PostList.vue |
src/views/ |
AllPostsView.vue |
src/views/ |
AuthorView.vue |
src/views/ |
PostView.vue |
src/views/ |
PostsByTagView.vue |
Within the subsequent sections, you’ll replace your smaller elements first after which proceed together with your view elements. You’ll do the changes on this order:
AuthorLink: Present a hyperlink to a given writer’s web page (utilized inSubmitandPostList).PostList: Render a given listing of weblog posts (utilized inAllPosts,Creator, andPostsByTag).AllPostsView: Add an inventory of all posts.PostsByTagView:Add an inventory of posts related to a given tag.AuthorView:Present details about an writer and an inventory of posts they’ve written.PostView:Show the metadata and the content material for a given publish.App:Take away some hyperlinks from the navigation.
You gained’t work with dynamic knowledge from the GraphQL API but. However by implementing the principle construction of every part you’ll be able to give attention to the GraphQL performance later within the tutorial.
Hyperlink to the Creator
The AuthorLink part ought to settle for an writer prop whose construction corresponds to the info about authors in your GraphQL API. Props are customized attributes that you should utilize in your part. The part ought to present the writer’s first and final identify if supplied, or the writer’s username in any other case.
Change the prevailing content material within the AuthorLink.vue file with the content material under:
This part gained’t work with GraphQL immediately however with a handed in writer object that different elements present. To have the ability to work with the writer object, you outline it as a prop in line 5 with defineProps().
The defineProps() perform returns an object that you would be able to retailer in a variable. That’s useful while you wish to entry properties from inside the <script> block such as you do in traces 6 and seven, for instance.
Word: You entry props in your <template> block immediately, with out prefixing them with props.
In traces 18 to 22, you create a hyperlink to the writer’s web page. To let Vue do the linking, you’re employed with the RouterLink part. The displayed identify in line 21 is the worth of a computed property.
Computed properties show you how to implement advanced knowledge into your <template> block. The displayName variable you outline in line 8 might be both the primary and final identify or the username of an writer.
Prep the Weblog Posts Record
You’ll be able to outline the props of a part with an inventory of strings. Nonetheless, you can even finegrain the data of the supplied props utilizing object syntax. For the PostList part, you’ll use object syntax to declare extra advanced props.
The PostList part accepts a posts prop, whose construction corresponds to the info about posts in your GraphQL API. The part additionally accepts a Boolean showAuthor prop. Ultimately, the part ought to show the next options:
- The title of the publish
- A hyperlink to the publish’s web page
- A hyperlink to the writer of the publish utilizing
AuthorLinkifshowAuthoristrue
Open PostList.vue within the src/elements/ listing and replace the file with the highlighted content material under:
Giving extra context to your props such as you do in line 5 can assist you and different builders to know the intention of the supplied props higher.
On this part, you’ll obtain an inventory of posts. You loop by means of them in line 20. While you use the v-for built-in Vue directive on a component, the ingredient and its contents are rendered for each step of the loop.
In every step of the loop, you present the title as a hyperlink utilizing RouterLink in traces 21 to 23. If the showAuthor prop is ready to true, you then additionally show the AuthorLink part in line 24.
Render All Weblog Posts
Now that you just’ve acquired PostList sorted, you’ll be able to transfer on to replace AllPostsView. This part ought to show an inventory of all of the posts on the weblog.
Open AllPosts.vue part within the src/views/ listing and replace it with the content material under:
In line 4, you put together the GraphQL API name, which you’ll implement later. You deconstruct the returned object into consequence, loading, and error utilizing JavaScript’s destructuring task.
When you’re fetching the info from the API, loading might be true. When you obtain the info, it’ll be the worth of consequence. If one thing goes incorrect, then error will comprise a message property with extra data.
For now, you solely outline an error message in line 5. Which means you gained’t present a Loading indicator or the PostList part as a result of each loading and consequence are undefined in the intervening time. Nonetheless, your <template> block is completely ready to work with the info you’ll get in consequence.allPosts while you implement the GraphQL API name later.
Present Posts for a Given Tag
Subsequent, replace the PostsByTagView.vue file within the src/views/ listing to match the code under:
The sample in traces 7 to 9 is similar as in AllPostsView. For now, you’ll work with a placeholder error message and implement the GraphQL API name later.
Moreover, you seize the present tag identify of the dynamically matched route in line 6. The tag variable definition will grow to be helpful in a while while you filter the posts for this particular tag.
To make your life simpler, you outline the customized variable to your template in line 15. By utilizing a certain attribute to set the tagPosts variable, you’ll save your self a little bit of typing in a while. That means, you should utilize tagPosts in your template as a substitute of consequence.postsByTag, which the API will return.
Present Info About an Creator
The AuthorView part acts as an writer’s profile web page. It ought to show the next data:
- A heading with the writer’s username
- A subheading with the writer’s full identify, if supplied
- A hyperlink to the writer’s web site, if supplied
- The writer’s biography, if supplied
- The listing of posts by the writer, with
showAuthorset tofalse
Replace the AuthorView.vue file in src/views/ with the content material under:
Later, while you get the info from the GraphQL API, you’ll render the data you define in traces 13 to 30:
- Line 13 reveals the writer’s username as a headline.
- Line 15 shows the writer’s full identify if their first identify and final identify are set.
- Line 17 checks if there’s a biography current. In that case, you then render the biography in line 18 and add an non-compulsory hyperlink to the web site in line 21.
- Strains 25 to 29 render the
PostListpart if the writer has posted. - Line 30 reveals a fallback message if there aren’t any weblog posts.
With AuthorView up to date, there are two elements left. First, you’ll sort out PostView and, after that, the App.vue part.
Show a Single Weblog Submit
Identical to the Submit knowledge mannequin in your Django app, the PostView part is a little more advanced as a result of it has the accountability of displaying all of the publish’s data. The part ought to show the next details about the publish:
- Title and subtitle, as a heading
- Creator, as a hyperlink utilizing
AuthorLink - Publication date
- Meta description
- Content material physique
- Record of related tags, as hyperlinks
Replace the PostView.vue file within the src/view/ listing with the highlighted content material under:
When the publish knowledge is current, it’ll be saved within the consequence variable you outline in line 6 and show the content material contained in the <template> block in traces 14 to 31.
In line 19, you cross the .publishDate of a publish into displayableDate(), which you outline in line 5. The publish date is saved as a datetime object in your database and gained’t look good with out some therapy. With the assistance of dateFormatter in line 4, you come back a well-readable formatted date within the template.
In traces 23 to 27, you render the tags a weblog publish comprises as dynamic hyperlinks. Every hyperlink will level to the tag-specifc URL. Thus far, your routes don’t acknowledge further params just like the one you present in line 24. In order that’s a very good reminder to sort out the App part and the routes subsequent.
Modify the Routes for the App
Within the earlier step, you added some hyperlinks to your weblog’s navigation to see if the views and elements render. Whereas updating the elements on this step, you’ll have observed that the majority of your hyperlinks require further parameters.
The one view that doesn’t require parameters is your AllPostsView. That is the one hyperlink you wish to hold in your navigation. Open App.vue and take away the opposite hyperlinks:
In line 11, you take away the RouterLink elements for writer, publish, and tag. Sooner or later, chances are you’ll add an About web page or different menu gadgets into <nav>. For now, hold the menu fundamental by simply displaying Posts.
In your index.js file you’re nonetheless referencing routes with none parameters. Replace router/index.js with the route parameters you added in your elements:
In traces 16, 21, and 26, you alter the path values to just accept the route params you used when rendering the RouterLink elements. Ensure that to not overlook the colon (:) in entrance of the param substring.
Step 7 Abstract
In the event you haven’t used Vue a lot earlier than, this step may need been so much to digest. You’ve reached an essential milestone, although. You’ve got a working Vue utility, full with dynamic routes and templates which are able to work with the content material the GraphQL API will present quickly.
You’ll be able to verify your utility is working by beginning the Vite server and visiting http://localhost:5173:
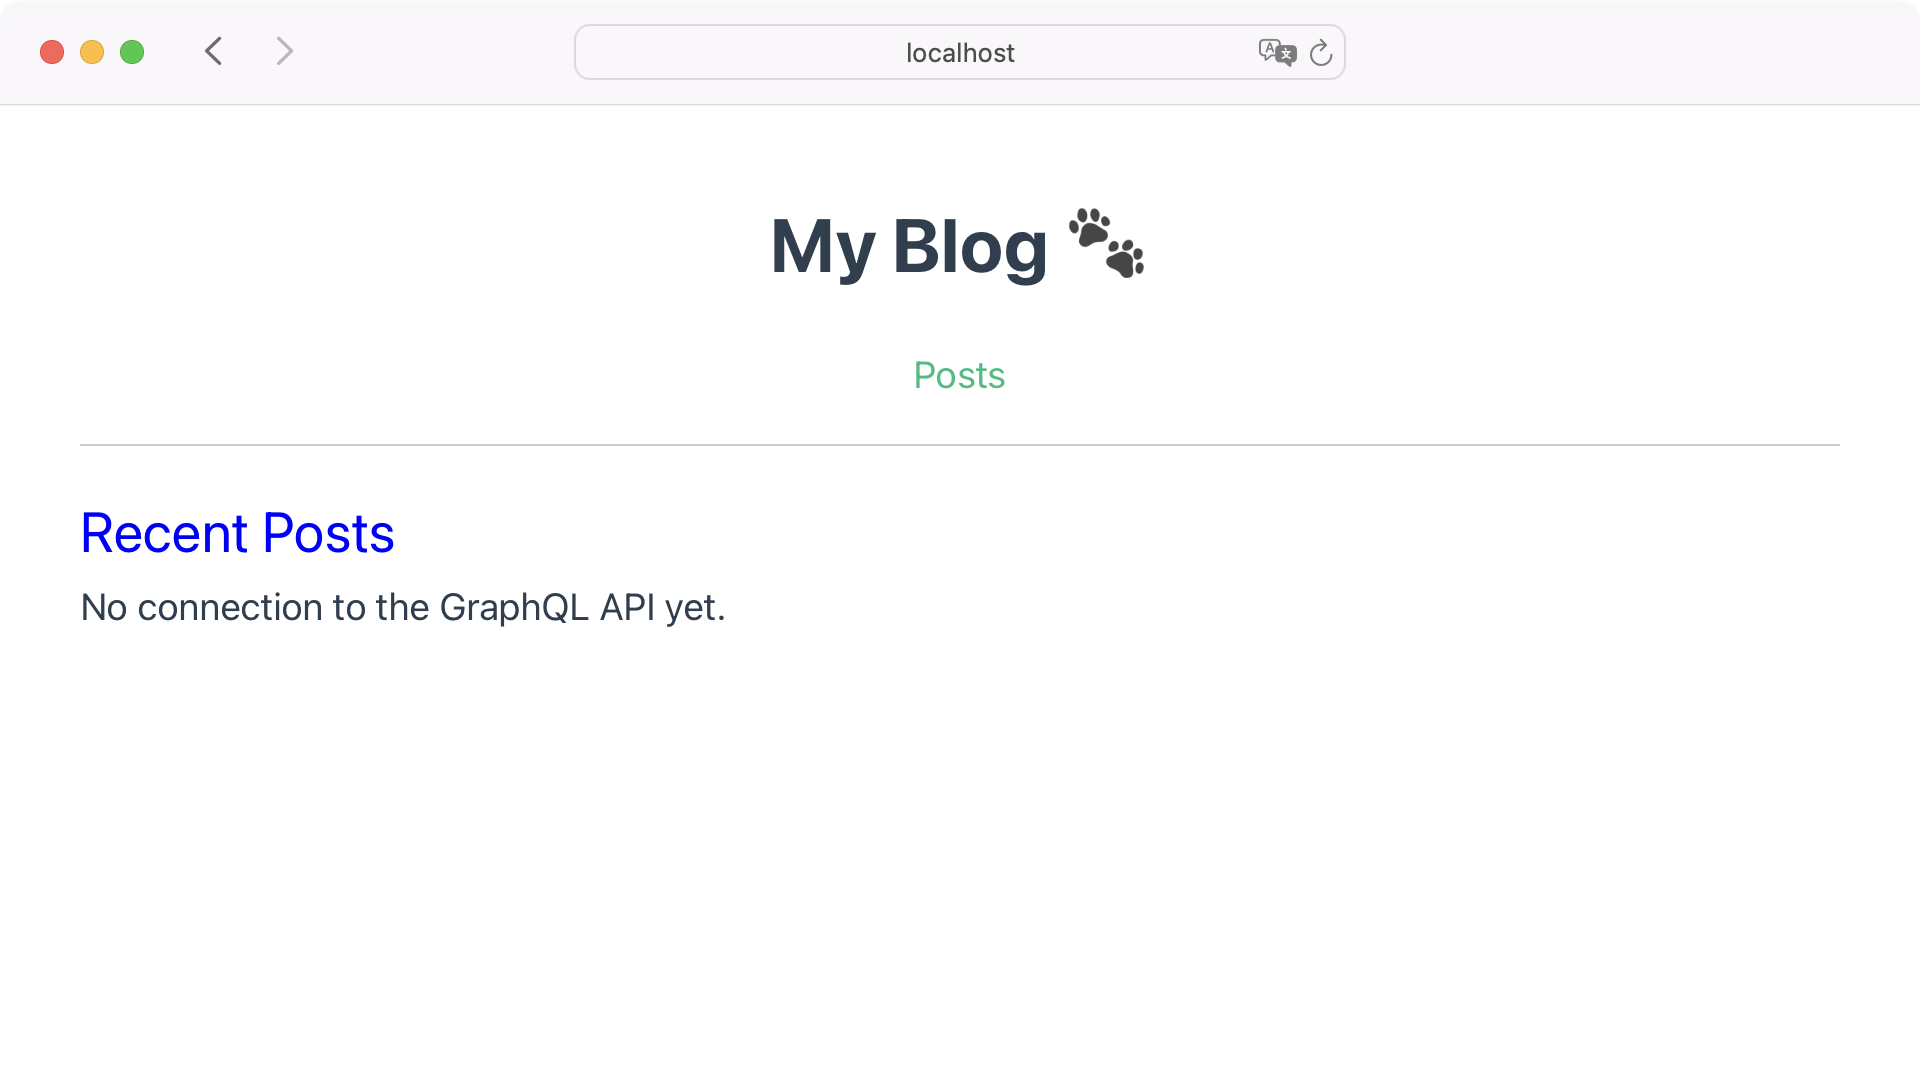
You need to see the Posts hyperlink and the Current Posts heading. In the event you do, you then’re able to tackle the ultimate step, the place you’ll use Apollo to question your GraphQL API to convey the entrance finish and again finish collectively.
Step 8: Implement Vue Apollo
To make querying the GraphQL API extra handy, you’ll use the Vue Apollo shopper. To combine Vue Apollo into your venture you must set up the Vue Apollo packages.
Set up Vue Apollo
To conveniently work with Apollo in your Vue venture, you want the Vue Apollo shopper and the apollo-composable package deal. Moreover, you’ll set up GraphQL.js and graphql-tag that can assist you write the GraphQL API queries.
Open a terminal window within the front_end/ folder and set up the packages with this command:
With all packages put in, you must make just a few changes earlier than you’ll be able to work with the GraphQL queries in your elements.
Configure Vue Apollo
Vue Apollo is usually configured out of the field, however you’ll want to inform it the precise endpoint to question. Additionally, you need the Apollo Shopper to do some caching. Open primary.js within the src/ folder and add your Apollo Shopper configuration to the file:
With these traces of code, you’re telling the Apollo Shopper the place to search out the GraphQL API. Additionally, you set the cache to InMemoryCache(). This lets you retrieve knowledge with out redundant community requests if the info hasn’t modified.
Subsequent, you must provoke your Vue app with the Apollo Shopper utilizing the Apollo Composable package deal. Keep in primary.js and replace the highlighted traces:
The present() perform you import in line 3 permits a part to supply knowledge or strategies to all its descendant elements. That is significantly helpful for deeply nested elements or while you wish to share frequent performance throughout many elements. The right instance of this mechanism is the DefaultApolloClient you import in line 11. Passing DefaultApolloClient to present() in line 26 makes the Apollo shopper out there in all of your elements.
In line 3, you additionally import h(). Vue makes use of the h() render perform to create Digital DOM components. The Digital DOM is a light-weight copy of the Doc Object Mannequin (DOM). In line 29, you inform Vue to make use of the h() perform to create a Digital DOM illustration of the App part and mount it as the foundation of your utility.
Step 8 Abstract
On this step, you put in further plugins comparable to Vue Apollo and also you configured the Apollo Shopper to have the ability to work together with your again finish.
While you try your entrance finish within the browser at http://localhost:5173, there aren’t any modifications on the floor. However that additionally means there aren’t any errors and also you configured the Apollo Shopper efficiently.
Word: If the npm run dev command doesn’t work correctly for you at this level, you’ll be able to attempt reinstalling your packages with npm set up --include dev.
Your Vue utility is now able to work with the GraphQL API. It’s time to get the again finish into the image once more!
Step 9: Fetch the Information
Now that you just’ve acquired every part prepped for displaying knowledge when it’s out there, it’s time to fetch that knowledge out of your GraphQL API.
On this final step of the tutorial, you’ll add the GraphQL queries to populate your pages. Earlier than you proceed, guarantee that your Django growth server is operating in a separate terminal window:
At this level, each the Vite server and the Django growth server needs to be operating in two separate terminal home windows.
Word: When you replace your elements, you might even see a “Load failed” error message in your weblog’s pages. When you’ve up to date all elements, this error needs to be gone.
In the event you’re not sure in regards to the question construction, then you’ll be able to leverage the GraphiQL platform at http://localhost:8000/graphql to check your queries earlier than you utilize them in your elements.
AllPostsView Question
The question for AllPostsView ought to solely return the set of data that you just render in your template. Which means you solely want your publish’s title, the slug, and details about the writer:
In line 3, you’re importing useQuery(), which helps you to execute a question and reactively monitor its consequence. The gql that you just import in line 4 lets you parse your GraphQL question string right into a question doc that useQuery() can perceive and work with.
You outline the GraphQL question in traces 7 to 19 inside the gql template literal. The content material is similar string that you just’d use on the GraphiQL platform. Right here, you request solely the precise set of information that you just want in your template.
While you name useQuery() together with your GraphQL question, it returns an object containing three properties:
consequence, which might be populated with the results of your question as soon as it has efficiently accomplishedloading, which istruewhereas the question is in progresserror, which can comprise particulars if there is a matter with the API request
These three properties allow you to manage while you show particular data to the consumer. You already ready your template to work with the properties, so you’ll be able to hold the content material in <template> as it’s and transfer on to the following part.
PostView Question
The question for a person publish should settle for the slug of the specified publish. It ought to return all the required items of data to show the publish data and content material. Consequently, the code to make the question work is a little more advanced.
Replace your PostView part with the highlighted code under:
This question pulls in a lot of the knowledge in regards to the publish and its related writer and tags. This time, you’ll must do a bit of additional work.
In traces 9 and 10, you outline route and seize the slug out of your route’s parameters. Then, you utilize the slug to your question in line 14.
AuthorView Question
Within the question for PostView, you fetched the only publish’s knowledge and a few nested knowledge in regards to the writer. Within the AuthorView question, you’ll must fetch the writer knowledge and the listing of all of the posts by the writer.
The writer question accepts the username of the specified writer and may return all the required items of data to show the writer and their listing of posts. It ought to seem like the next:
This question makes use of postSet, which could look acquainted for those who’ve achieved some Django knowledge modeling earlier than. The identify “publish set” comes from the reverse relationship Django creates for a ForeignKey subject. On this case, the publish has a overseas key relationship to its writer, which has a reverse relationship with the publish known as post_set. Graphene-Django has robotically uncovered this as postSet within the GraphQL API.
PostsByTagView Question
The question for PostsByTagView is fairly just like question in AllPostsView. The essential distinction is that the question in PostsByTagView requires the specified tag and returns the listing of matching posts.
Open PostsByTagView.vue and alter the file with the highlighted code under:
You would possibly discover that some items of every question look fairly just like each other. Though it gained’t be lined on this tutorial, you should utilize GraphQL fragments to scale back duplication in your question code.
Step 9 Abstract
Now that every part is fetching the info it must show, you’ve arrived at a functioning weblog. Run the Django growth server and the Vue growth server. Go to http://localhost:5173 and flick through your weblog:
Congratulations! You began by making a Django weblog again finish to manage, persist, and serve the info for a weblog. Then you definitely created a Vue entrance finish to eat and show that knowledge. You made the 2 talk with GraphQL utilizing Graphene and Apollo. Properly achieved!
Subsequent Steps
Chances are you’ll already be questioning what you are able to do subsequent. To additional validate that your weblog is working as anticipated, you might attempt the next:
- Add further pages like an About web page to the navigation menu of your weblog.
- Create overview pages the place you show all authors and tags.
- Make some posts unpublished to substantiate that they don’t present up on the weblog.
In the event you’re feeling assured and adventurous with what you’ve gotten going, you can even take this method of yours even additional:
- Increase your knowledge mannequin to create new conduct in your Django weblog.
- Create new queries to supply fascinating views in your weblog’s knowledge.
- Discover GraphQL mutations to jot down knowledge along with studying it.
- Add CSS to your single-file elements to make the weblog extra eye-catching.
The information modeling and part structure you’ve put collectively is remarkably extensible, so take it so far as you want!
Conclusion
You’ve seen how you should utilize GraphQL for constructing typed, versatile views of your knowledge. You should utilize these similar methods on an current Django utility you’ve constructed or one you propose to construct. Like different APIs, you should utilize yours in most any client-side framework as properly.
On this tutorial, you realized how one can:
- Construct the Django weblog knowledge mannequin and admin interface
- Wrap your knowledge mannequin in a GraphQL API utilizing Graphene-Django
- Create and path to separate Vue elements for every view of the info
- Question the GraphQL API dynamically to populate your Vue elements utilizing Apollo
You lined a variety of floor, so attempt to establish some new methods to make use of these ideas in several contexts to solidify your studying. Glad coding, and blissful running a blog!
You’ll be able to obtain the entire supply code for this venture by clicking the hyperlink under:
[ad_2]